Your first service
How to create your church service program
The program brings together the order of service, who is in charge of each part and everything that will be projected. Once it is created, everyone on the team sees it up to date on their own device.
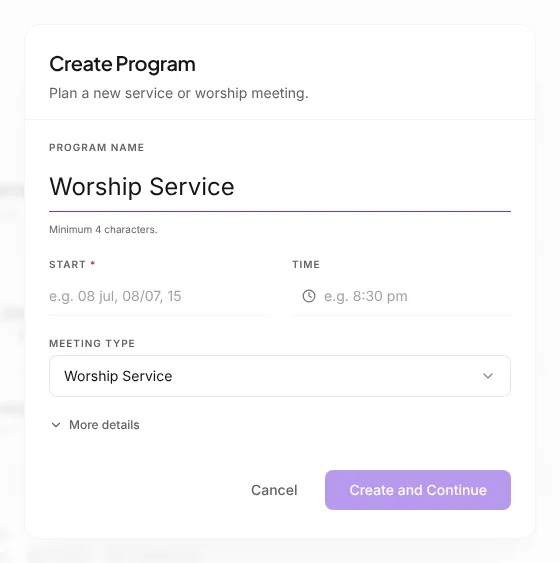
Create the program
- Go to Programs from the main menu and tap Create Program.
- Type the name (for example, Sunday service) and the start date and time. If the service ends on another day, use Add end date.
- Choose the Meeting Type and whether it is in person or virtual. For an in-person service you can use your organization's address.
- Tap Create and Continue: the program editor opens, ready for you to add the content.
Tip:If you already have a saved template, you can start from it and avoid building the same sections every week.
Add the service content
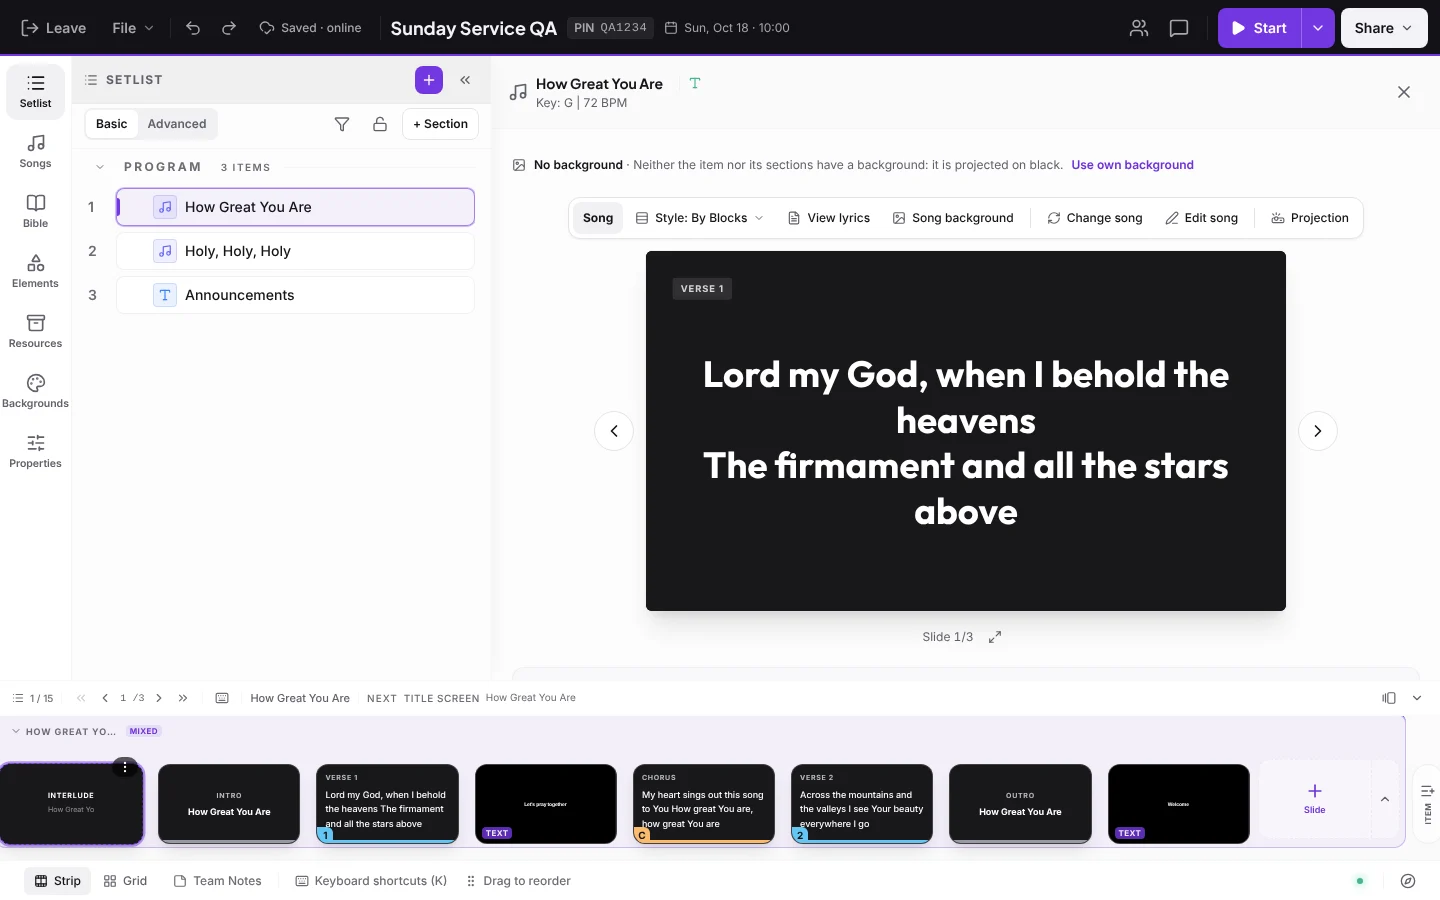
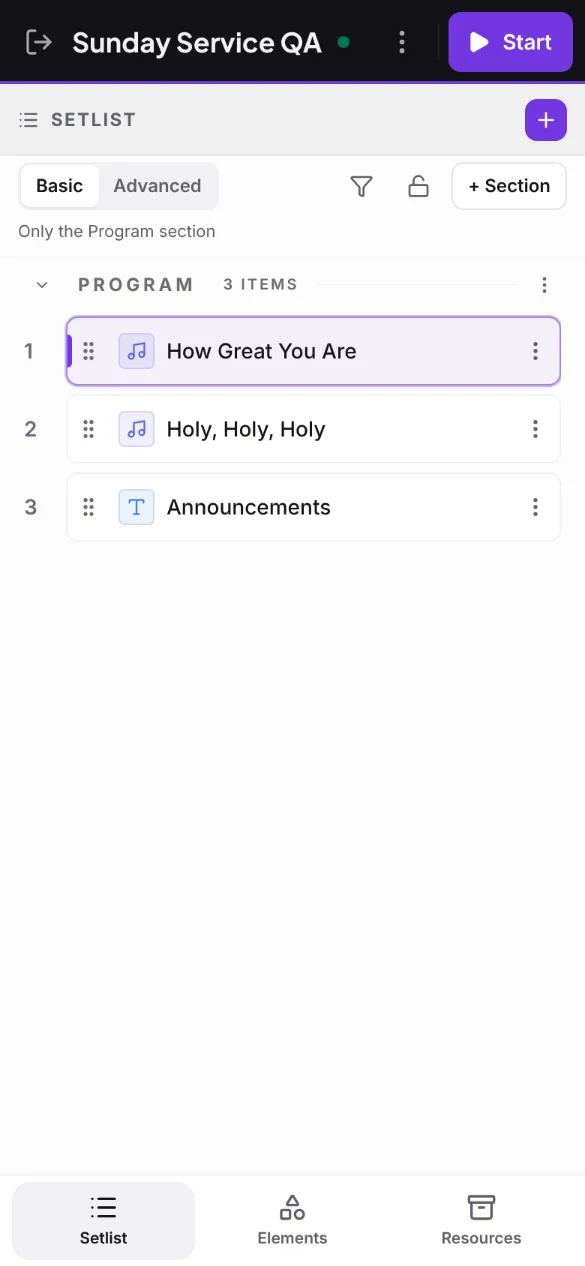
In the Setlist you organize the service into sections (welcome, worship, Word, closing) with + Section, and inside each one you add the items with the + button.
- Songs from your library, with their lyrics ready to project.
- Bible passages, announcements and text slides.
- Media: images, videos and YouTube links. In YouTube / Link you can paste the link or search for the video with the magnifying glass.
- Canva designs, web pages, countdowns, calls to action with a QR code and live polls.
Project a video together with a call to action
You can project a YouTube video next to a QR code, for example the video of your giving campaign while the congregation scans the code to give. You set it up from the same place where you add a video:
- In the program editor, add a Media item and choose YouTube / Link.
- Paste the video link or search for it, and tap Continue. If you want, adjust the start, the end or check Mute video.
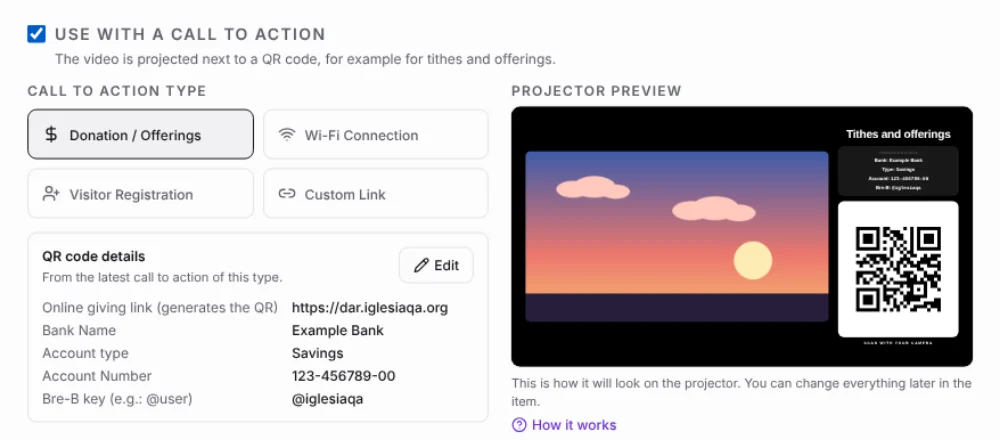
- Check Use with a call to action and choose the type: Donation / Offerings, Wi-Fi Connection, Visitor Registration or Custom Link.
- Check the QR code details. If your church already saved them in Settings › Organization › Contact & Social (WiFi, Tithes / Donations or New Visitors), they are used automatically; if not, they come from the latest call to action of that type. To change them tap Edit, and if there are no details yet, the window to type them opens on its own. Next to them you see how it will look on the projector.
- Tap Add call to action. A Call to Action item is created with the video on the left and the title and QR code on the right.
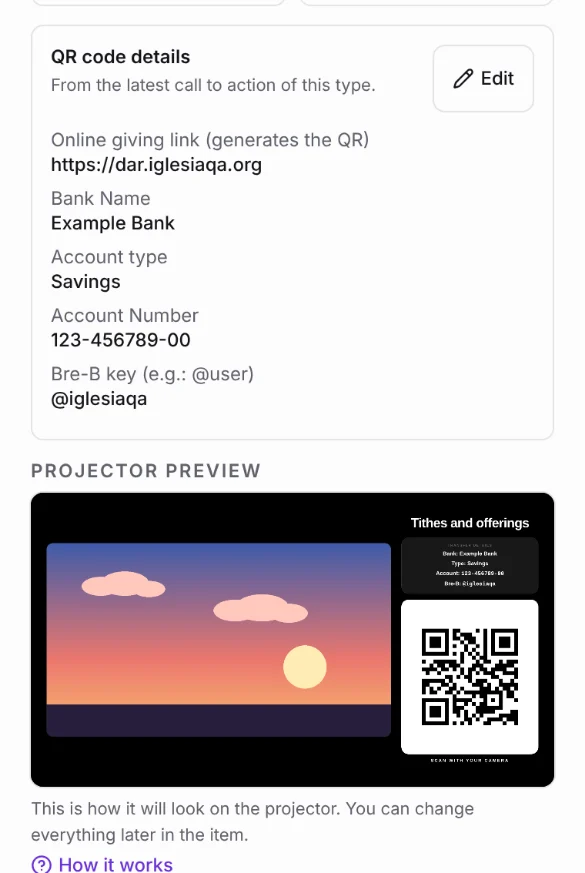
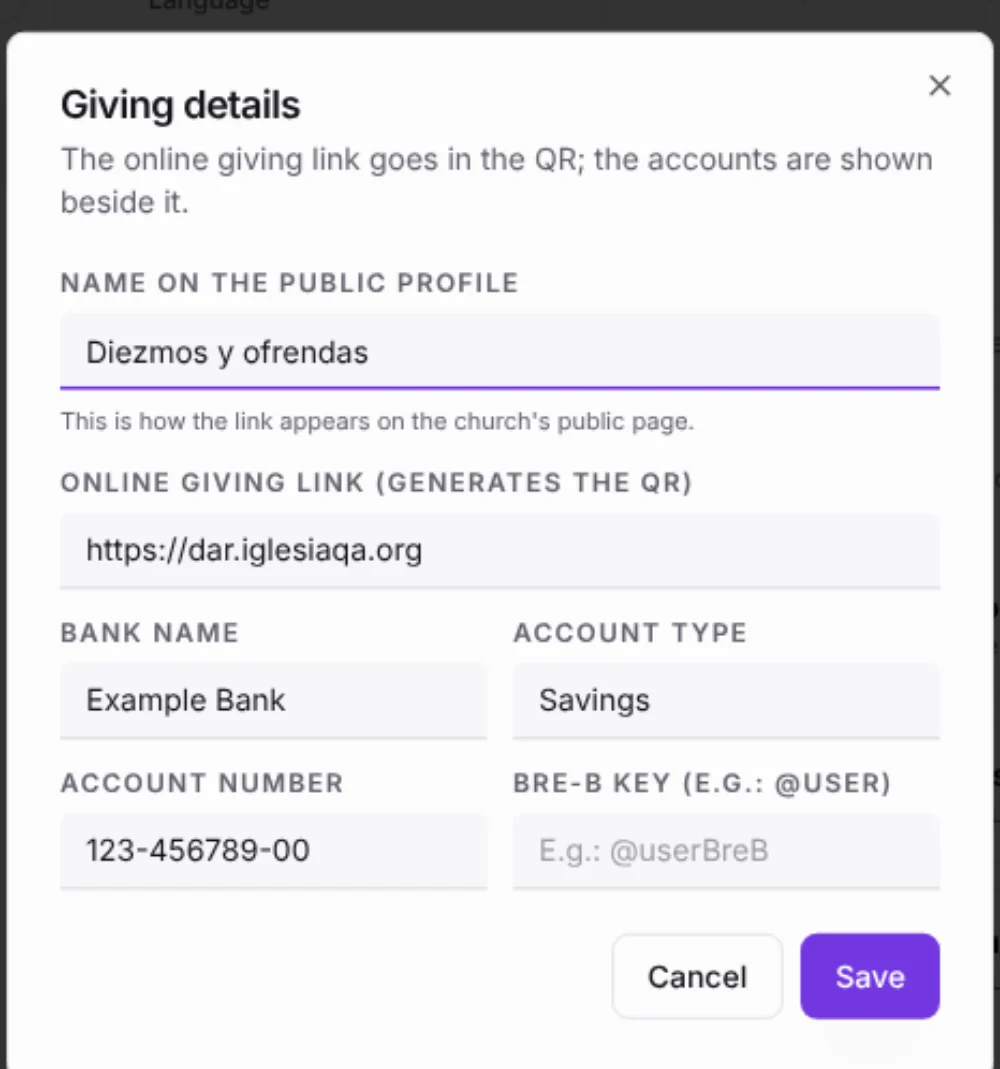
Tip:The details are typed in one window, the same in Settings, in Add Link and when editing the item. From here, check Also save in Settings to use them next time (the Admin saves the WiFi and giving details; Admin and Co-Admin save the visitor link). Without a link (or without the Wi-Fi network name) the projector shows no QR code, and the window tells you what is missing. The video repeats while the call to action is on screen. This option is available on the Pro and Church plans.
Add an item to My Library
Did you use a song, an announcement or a file in the program and want to keep it handy for other services? Open the item's three dots in the Setlist and choose Add to my library. Each type goes to its place:
- Songs: to My Library › Songs.
- Announcements: to My Library › Announcements.
- Countdown, text, free slide and call to action: saved as a template in My Library › Announcements › Announcement Templates (Church plan).
- Multimedia, Canva and web links: their files and links go to My Library › Resources.
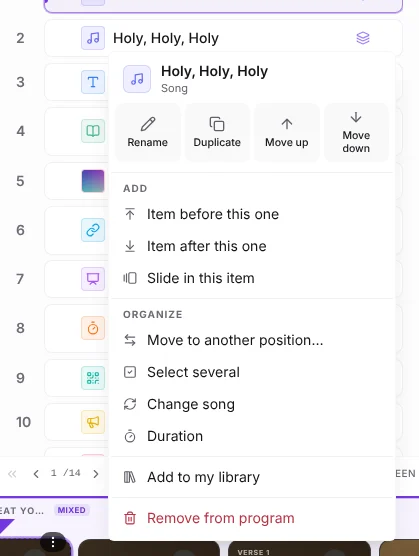
Tip:What you added only for this program, such as extra slides or a different verse order, stays in the program. The library gets the song or announcement as it is.
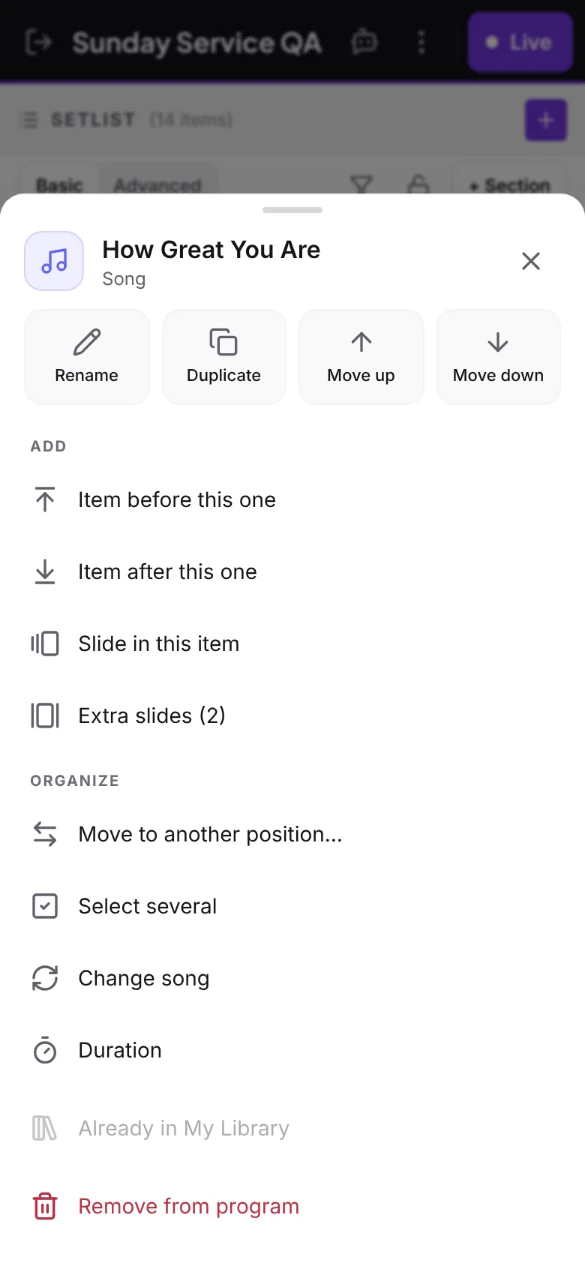
If the item is already in your library, the option reads Already in My Library and can't be selected, so no duplicate copies are made. Bible passages, interludes and polls don't have this option.
Receive files with the file collection link
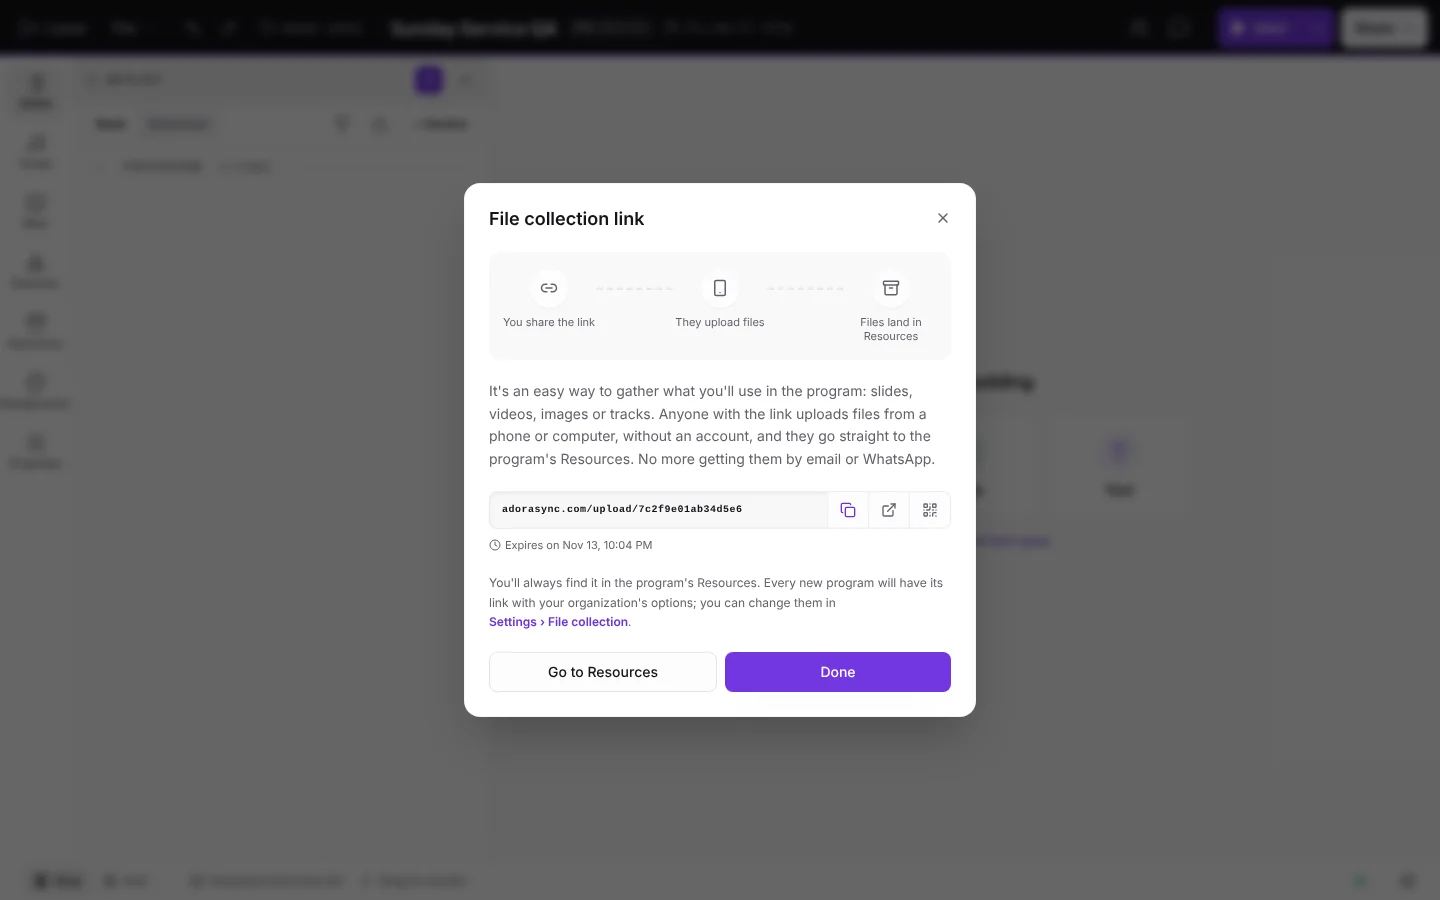
Each program can have a file collection link. You share it with whoever is taking part and each person uploads their presentations, videos, images or backing tracks from their phone or computer, without creating an account. The files go straight to the program's Resources, without going through email or WhatsApp.
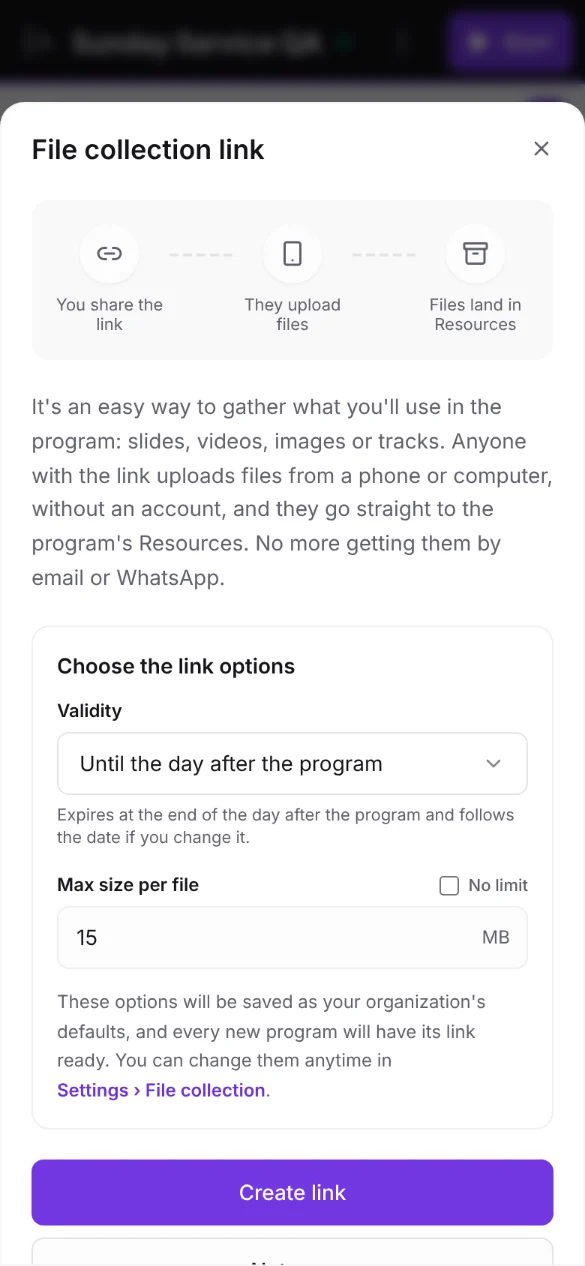
- The first time you create a program, a card appears in the corner of the editor. Tap Set up link.
- Choose the Validity (for example, Until the day after the program) and the Max size per file, and tap Create link.
- Copy the link or show its QR code to share it.
- If you close the card, the link stays in the program's Resources: tap File collection link, right below Add resource, to see it or create another one.
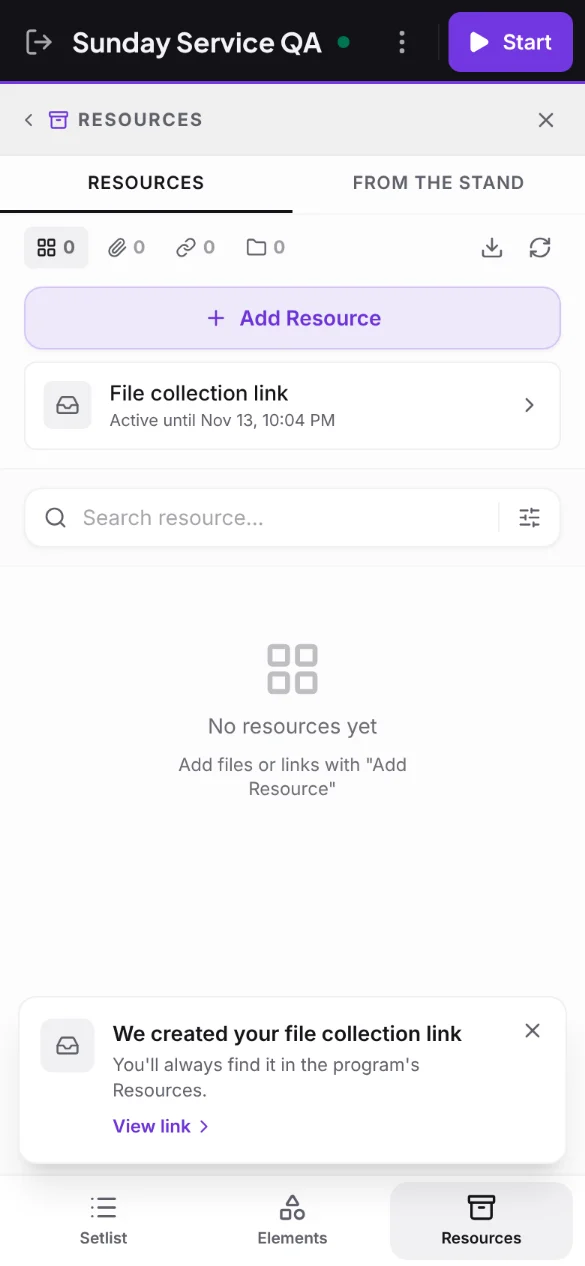
Those options are saved for your organization: from then on, every new program is created with its link and the card says We created your file collection link, with a View link button.
To change the options or stop creating the link with every program, go to Settings › File collection. Only Admin, Co-Admin and Media Technician can do it.
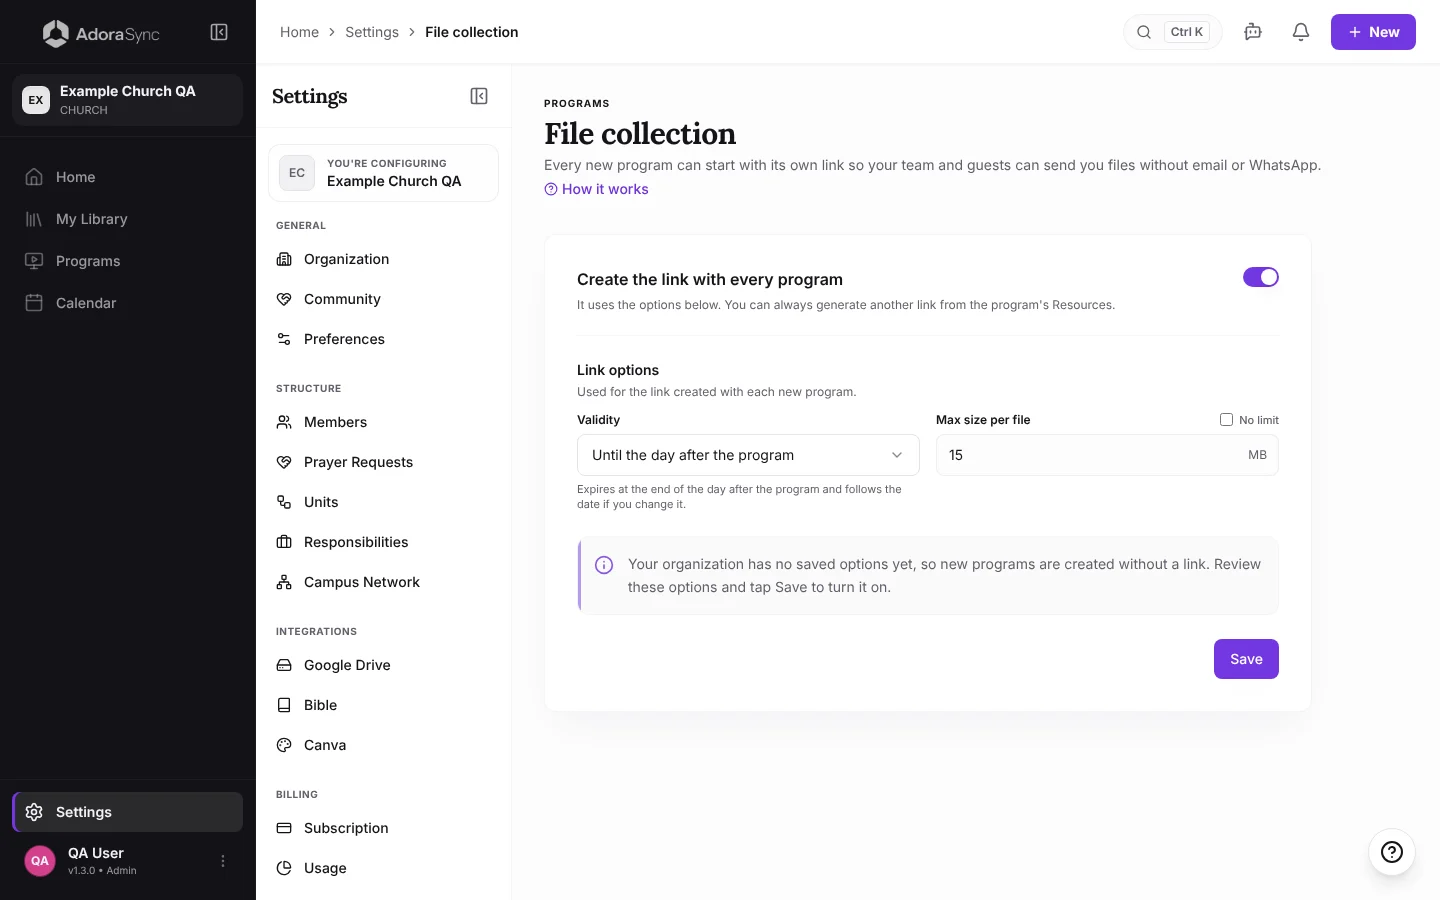
Tip:With Until the day after the program, the link adjusts by itself if you change the program's date.
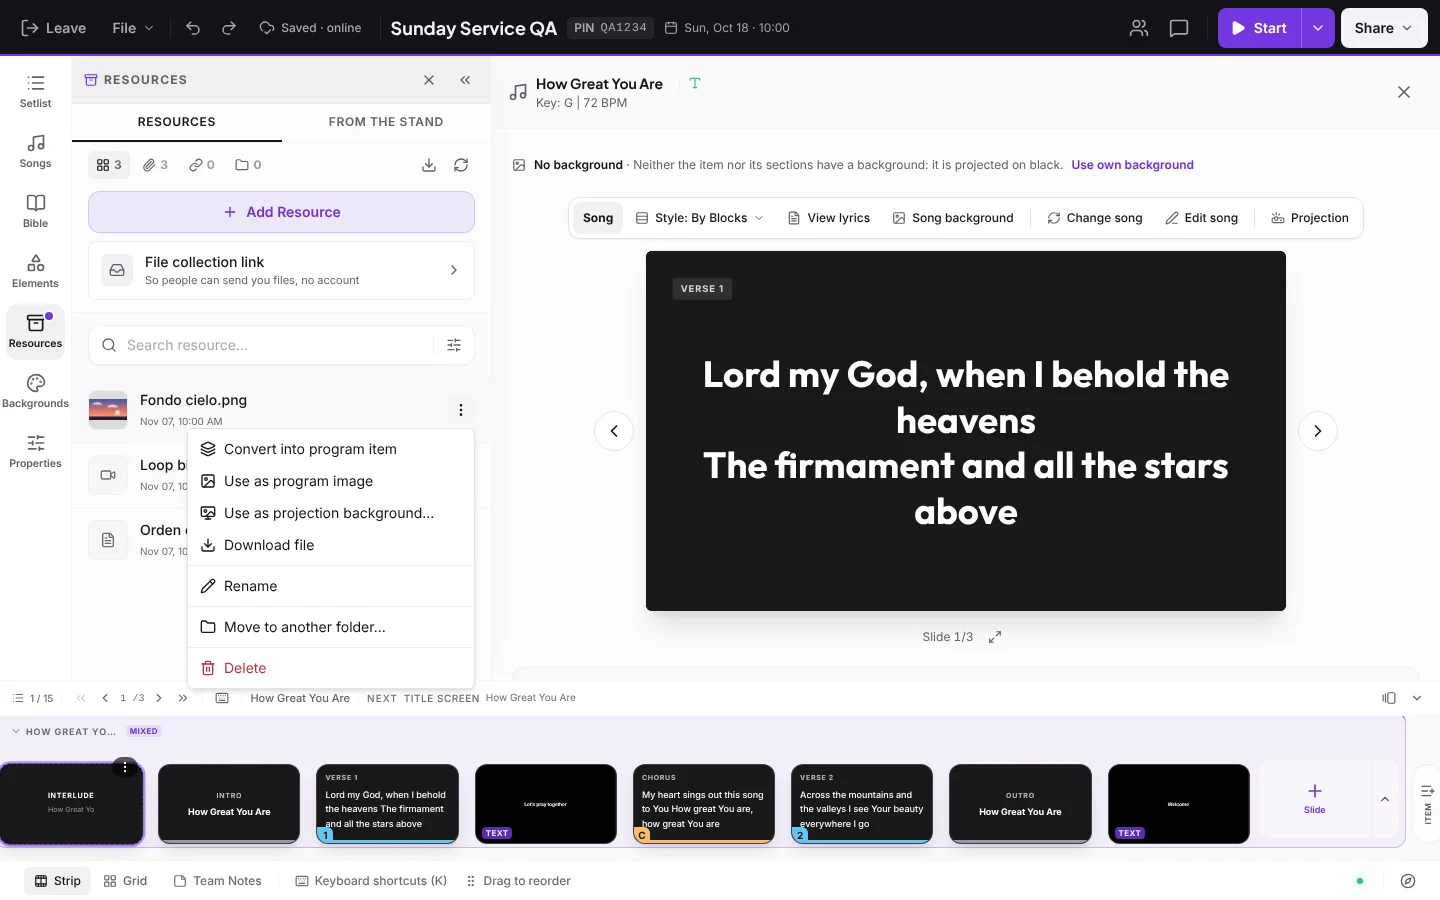
When you receive an image or a video, open it with the three dots in Resources. With Use as program image the image becomes the program's cover. With Use as projection background… you choose where it shows: in the whole program, only in certain sections or as hold screen (the last one, only for images).
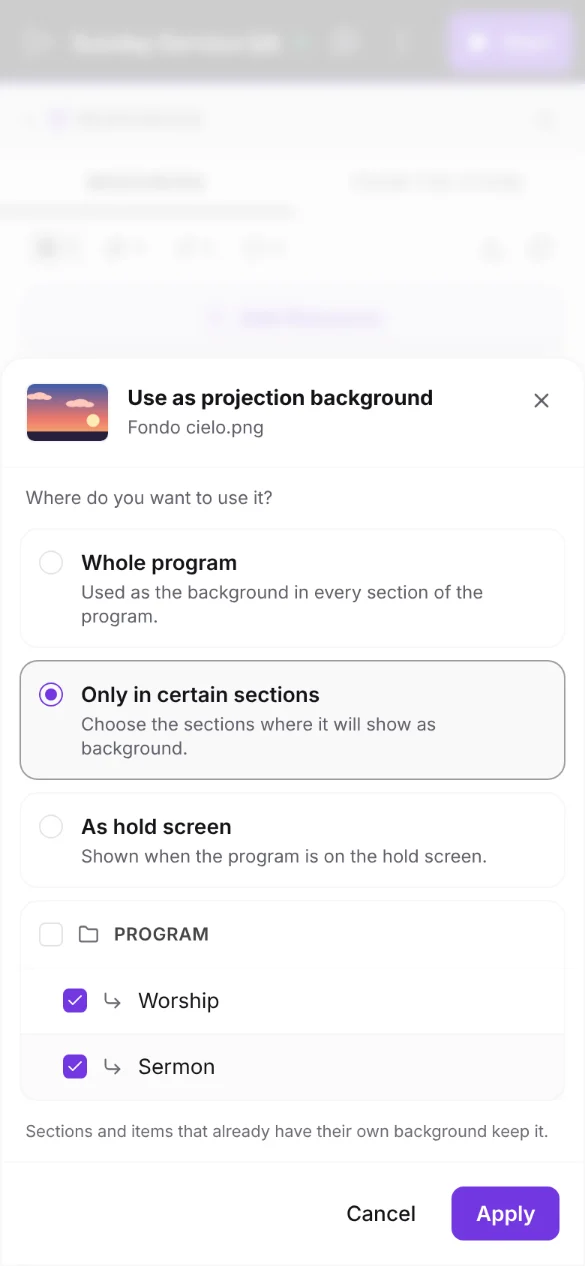
Tip:Sections and items that already have their own background keep it.
Turn a received image into an announcement
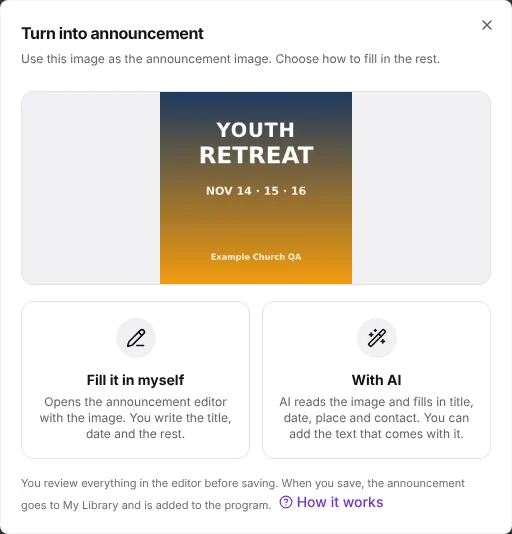
If an event poster arrives through the upload link, you can turn it into an announcement without downloading it or uploading it again. In Resources, open the image with the three dots and tap Turn into announcement. You choose how to fill it in:
- Fill it in myself: the announcement editor opens with the image already in place, and you write the title, date and the rest.
- With AI: the image goes to Announcement from an image. If you want, paste the text that came with it in Announcement description (optional) and tap Create with AI. AI reads the title, date, place and contact. Available on the Pro and Church plans.
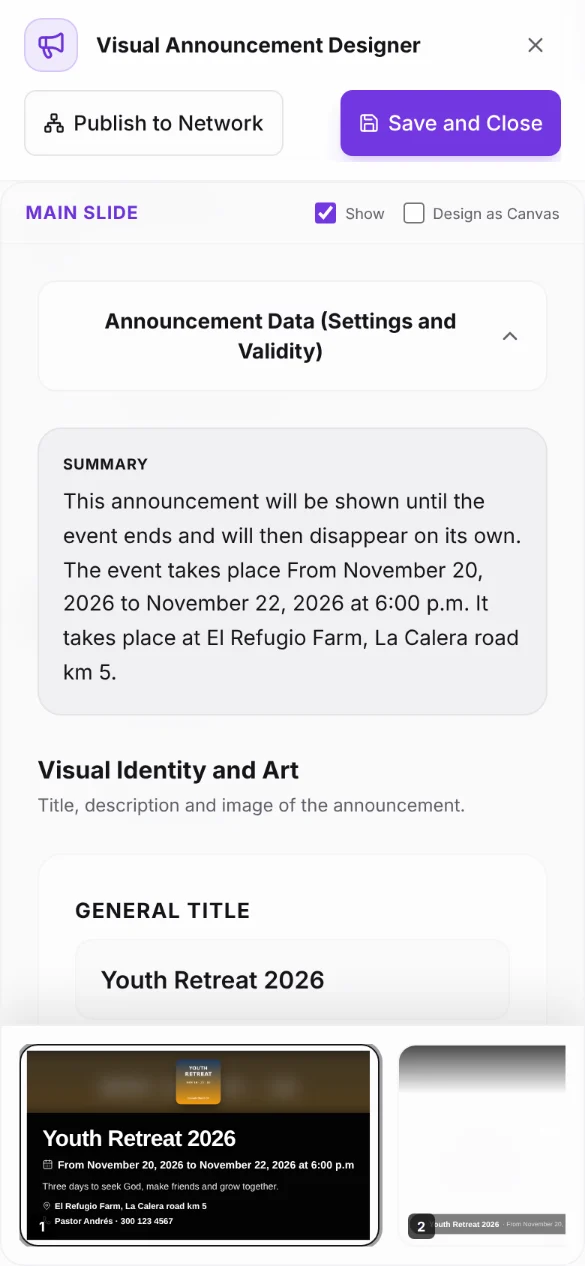
Also in the announcement editor: once the announcement has its Official Announcement Image, tap Fill in with AI above the title. AI reads the image and fills in only the empty fields; what you already wrote doesn't change.
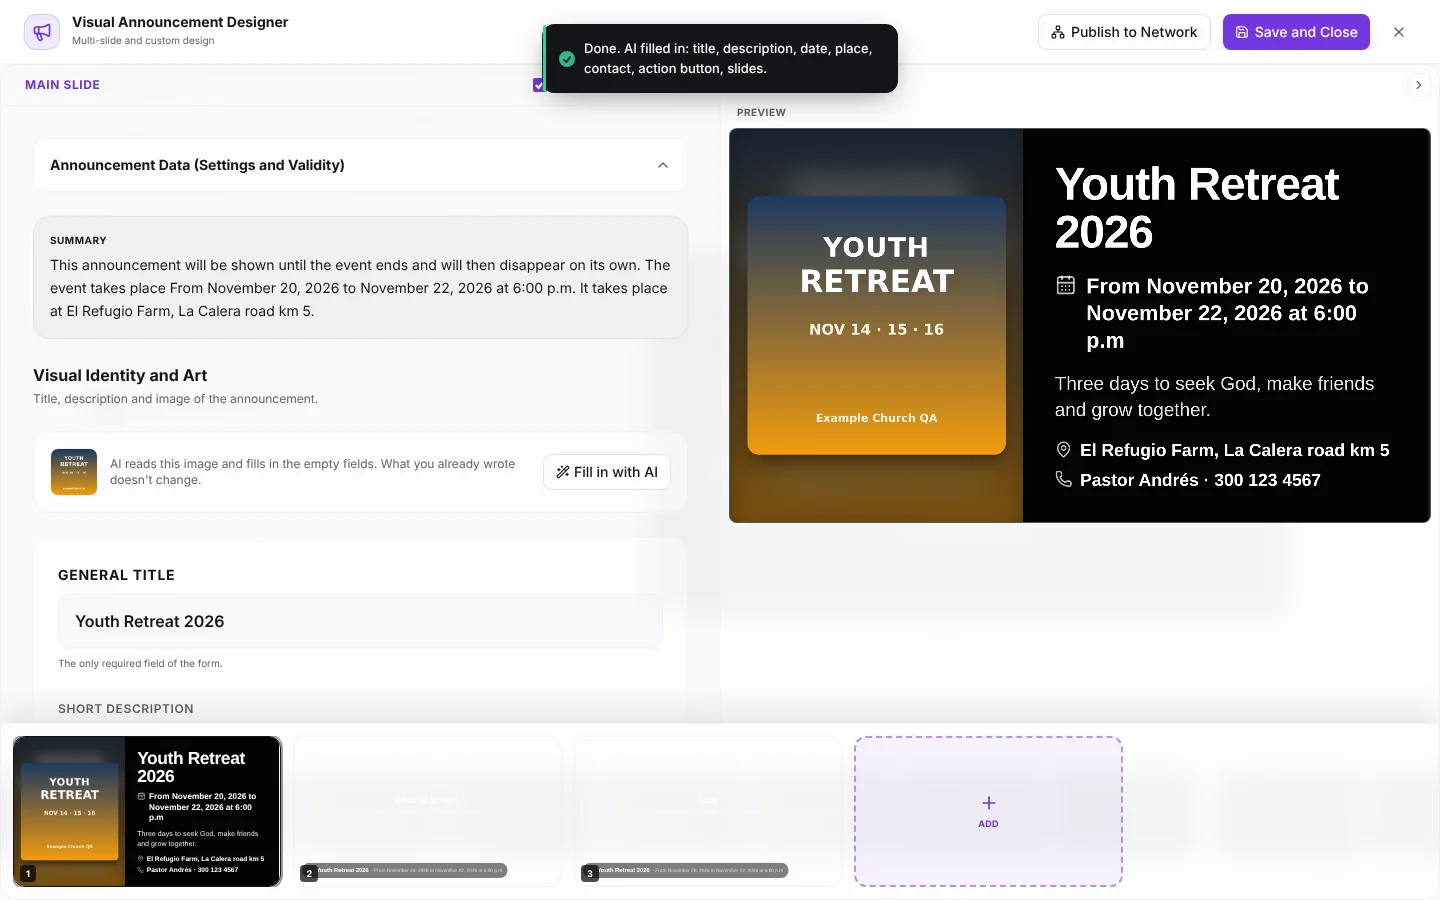
Tip:Nothing is saved until you tap Save and Close. When you save, the announcement goes to My Library › Announcements and is added to the program.
Assign who is responsible
Each section can have its own person in charge. That way, whoever preaches, leads the prayer or sings knows exactly what their part is and when, without relying on scattered messages.
Frequently asked questions
Can I reuse a program from another week?
Yes. You can save a program as a template and use it as the starting point for the next service, or duplicate an existing one.
Does my team need to install anything to see the program?
No. AdoraSync works in the browser on a phone, tablet or computer, without installing apps.