Projection
How to advance the service from your phone
The remote control turns any phone into the projector's remote. It helps when the media technician is at the sound desk or when whoever is leading wants to advance without depending on anyone.
Open the remote control
- Open the program live.
- In the top bar, tap the phone button to open Remote Control.
- A window opens with the QR code in view: the other person scans it with their phone camera. You can also copy the link or open it in another tab.
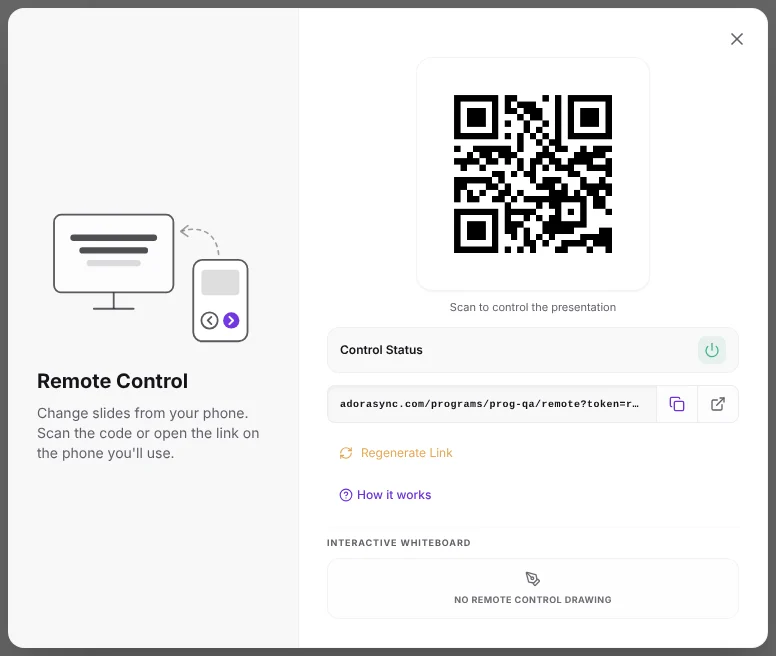
Advance from your phone
When you open the link, the phone shows the slide on air, the next one and your speaker notes, with the big Previous and Next buttons. When an item ends, Next moves on to the next one in the program.
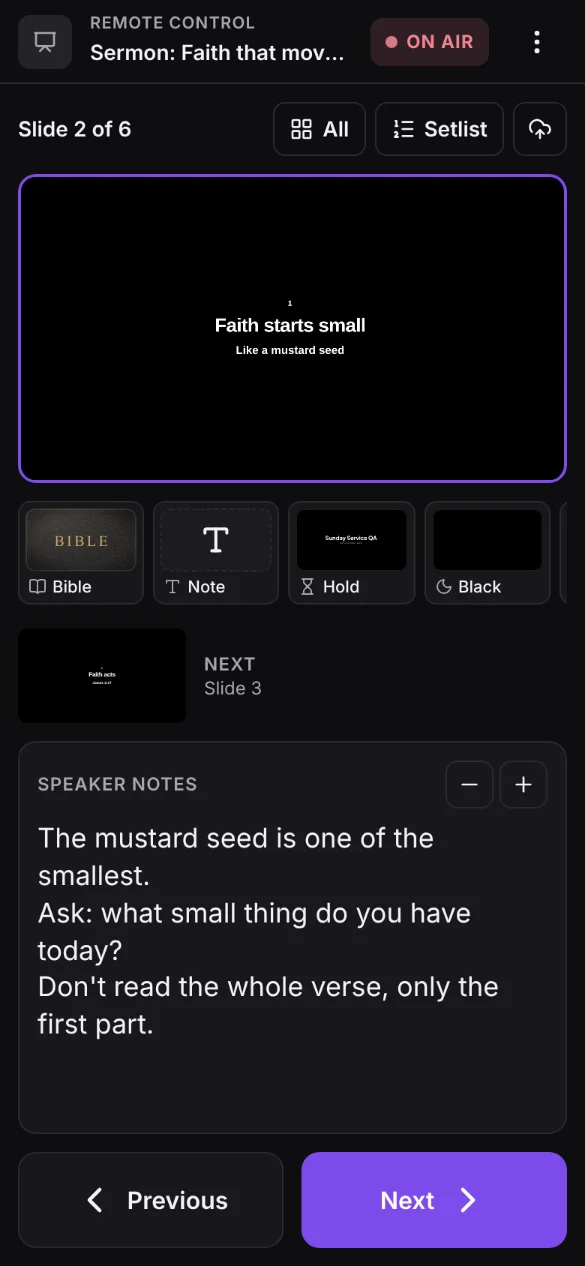
- At the top, All shows the item's slides, Setlist opens the whole program to jump to another item, and the cloud opens the uploaded Files to show them on screen.
- Below the slide are the quick screens from the live panel: Bible, Note, Hold, Black, White, Logo, Background only and Interlude. Tap one to show it and again to go back to the program. If the Bible has no saved reference, type it and tap Project. On a phone, Bible and Note open full screen: you see the text on air in large type, move between verses with Previous and Next, and finish with Back to the program.
- The ⋮ menu has the Virtual whiteboard, the QR code and Classic view, the previous control.
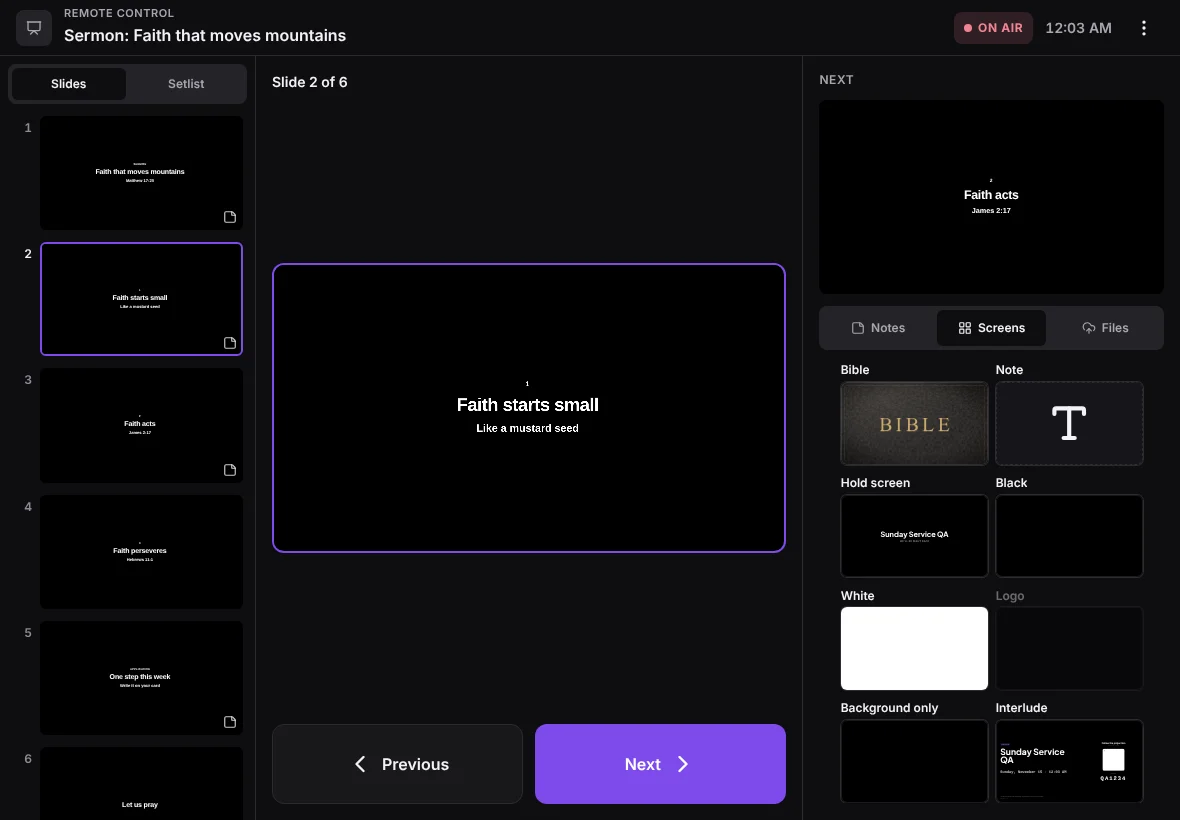
Know when the slide was changed from a phone
Every time someone changes the slide from the remote control, the live panel shows a discreet notice for a few seconds: Changed from the remote control, with the name of the person using it when they signed in with their account. You don't need to close it: it disappears by itself, and if they advance several times in a row the same notice is reused.

Use a presenter remote to change slides
Wireless presenter remotes (USB or Bluetooth clickers) work with the live panel without installing anything: the computer treats them as a keyboard.
- Plug the remote's USB receiver into the computer that has the live panel open.
- Click once on the live panel, or on the projector window, so the browser gives it focus.
- Use the usual buttons: next and previous change slides (also verses when the Bible is on air).
- The black screen button (key B or .) shows the Black quick screen; press it again to return to the program.
- The start presentation button (F5) does not reload the live panel or the projector.
- The first time you use it, the Presenter remote detected notice appears. From then on the B key is black screen and no longer opens the Bible.
- If focus is on the projector or return window (on the same computer), the keys still reach the live panel.
- All keys are listed in the shortcuts window: press K in the live panel.
Speaker control: only the presenter's slides
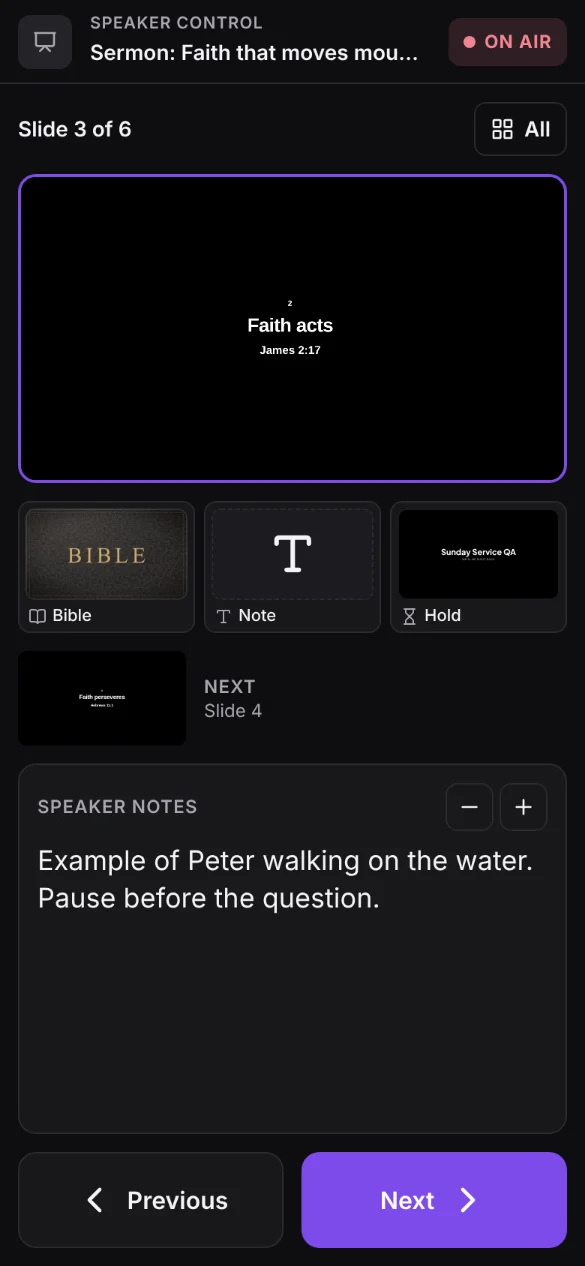
When someone presents their own part (the sermon, a report, a class), you can give them a control just for their item. On their tablet or phone they see the slide on air, the next one and their speaker notes, and they move their slides without being able to change the rest of the program.
- In the live panel, open Remote Control. At the bottom, under Speaker control, choose the presenter's item.
- You can also find it in the editor, in the item's ⋮ menu › Speaker control.
- The person scans the QR code with their tablet or phone. Each item has its own link.
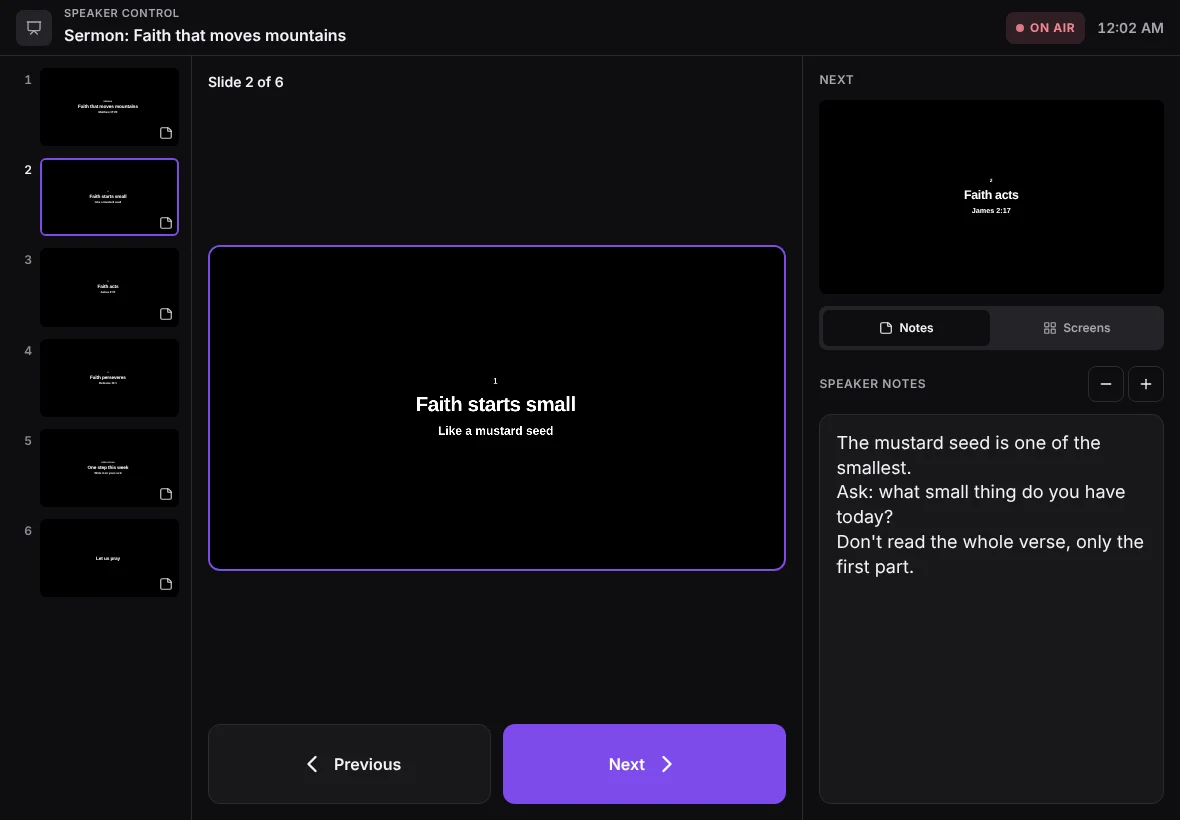
- With Bible, Note and Hold they can show a verse, a message or the hold screen while their item is on air. They don't see the setlist or the uploaded files.
- They only move their item's slides: on the last one it doesn't continue with the rest of the program, and they never see the setlist.
- With − and + they change the size of their notes.
- On the phone, All shows all their slides to jump straight to one.
- If their item isn't on air yet, the top says Not on air yet and they can rehearse without projecting anything.
- They can also advance by swiping, with the keyboard arrows or with a wireless presenter.
- Change link disables the previous one, and turning off Control Status stops it too.
Good practices
- If you shared the link by mistake, tap Regenerate Link: the previous one stops working.
- With the Control Status switch you turn the remote control off when you don't need it.