Projection
How to use your phone as a live camera
With the phone camera, any phone becomes a live camera: you scan a QR code from the live panel and whatever the phone sees appears on the projector. You can also take photos that are projected instantly and stay saved in the program. It is part of the Pro (1 camera at a time) and Church (2 at a time) plans.
Connect a phone
- Open the program live.
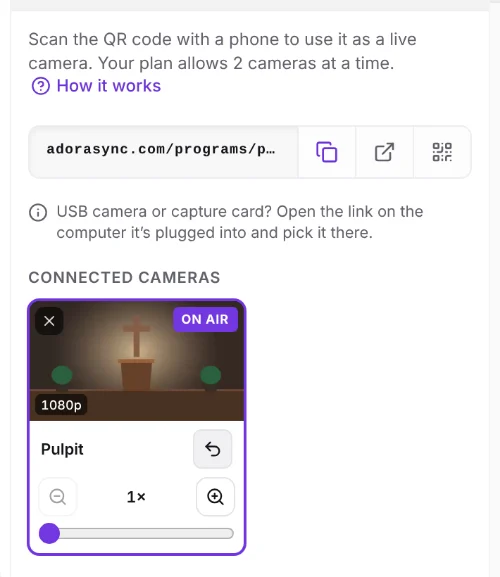
- In the top bar, tap the camera button to open the Camera menu.
- Scan the QR code with the phone that will film (or copy the link and open it on that phone). There is no need to sign in.
- On the phone, type a name such as Pulpit or Choir, allow camera access and tap Start streaming.
Put the camera on the projector
In the Camera menu, each connected camera has a button to show it alone, full screen; the camera is marked as On air. To combine cameras with the slide, see the next section. To go back, tap Back to program or project any slide.
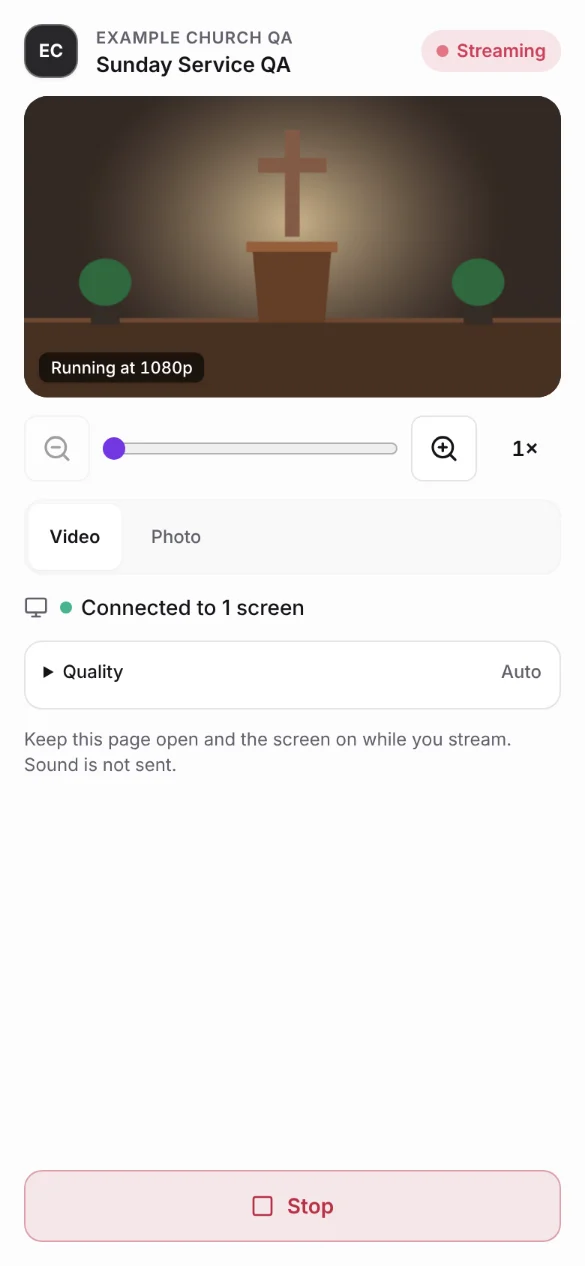
- If the phone stops streaming while it is on air, the screen goes back to the program by itself.
- The video has no sound: audio keeps coming from the church's sound desk.
- With the X in the menu you disconnect a phone; the phone shows that it was disconnected.
Zoom in and out
While the camera is streaming, the zoom control appears below the preview.
- Press and hold the zoom in or zoom out button to zoom smoothly and continuously; let go when you reach the framing you want. A short tap takes a small step.
- Drag the slider to jump to a level, or pinch the preview with two fingers like in the camera app.
- Tap the value (for example 2×) to go back to 1×.
- You can also do it from the live panel: in the Camera menu, each connected phone has its own zoom control, so you can zoom without touching the phone.
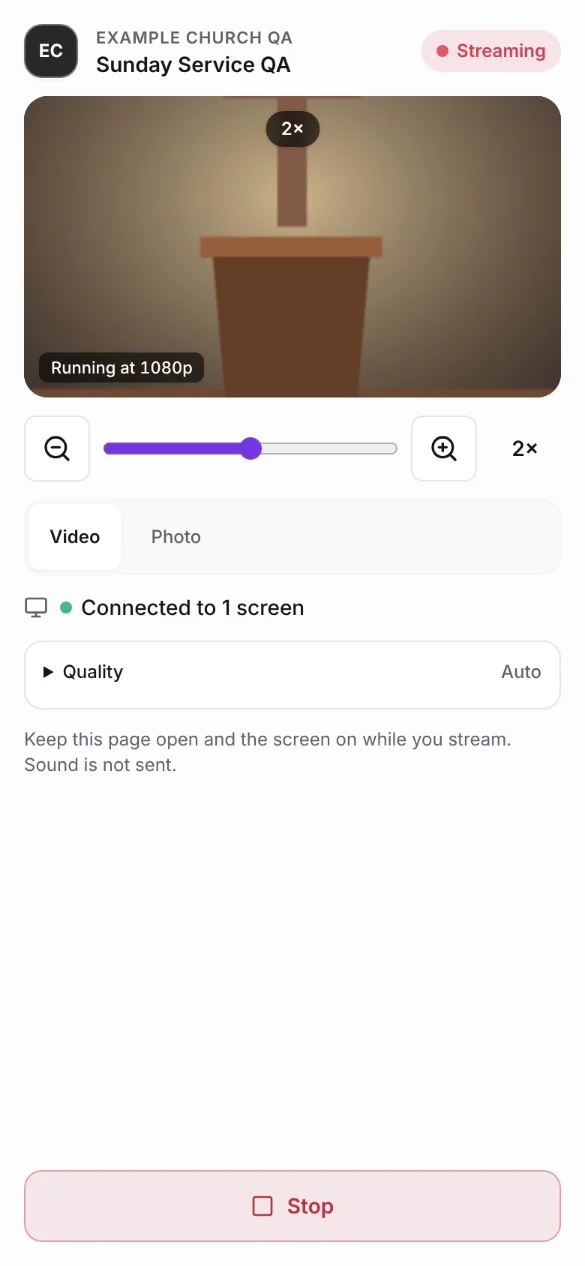
Note:If the phone has its own zoom (most recent Android phones and iPhones with iOS 17 or later), that is used and looks sharper. Otherwise the zoom is digital, up to 4×: it enlarges the center of the image.
Combine cameras and the slide
- In the Camera menu, under Layout, choose how many boxes you want: one camera, two side by side, a main one with another next to it, one in a small box, three or four.
- Below, choose what goes in each box: a camera or the Current slide (the lyrics or verse that is on air).
- Type the Headline / Label and, if you like, the Subtitle and the ticker. As you type, the Lower third turns on by itself.
- Under Template, choose the style: Studio, Newsroom, Elegant or Minimal.
- Tap Put on air.
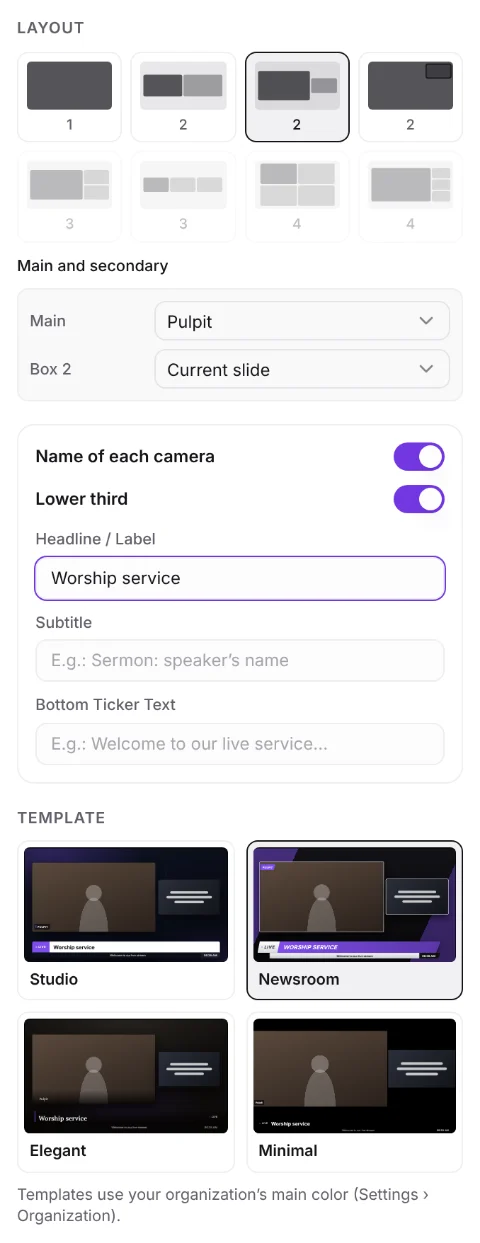
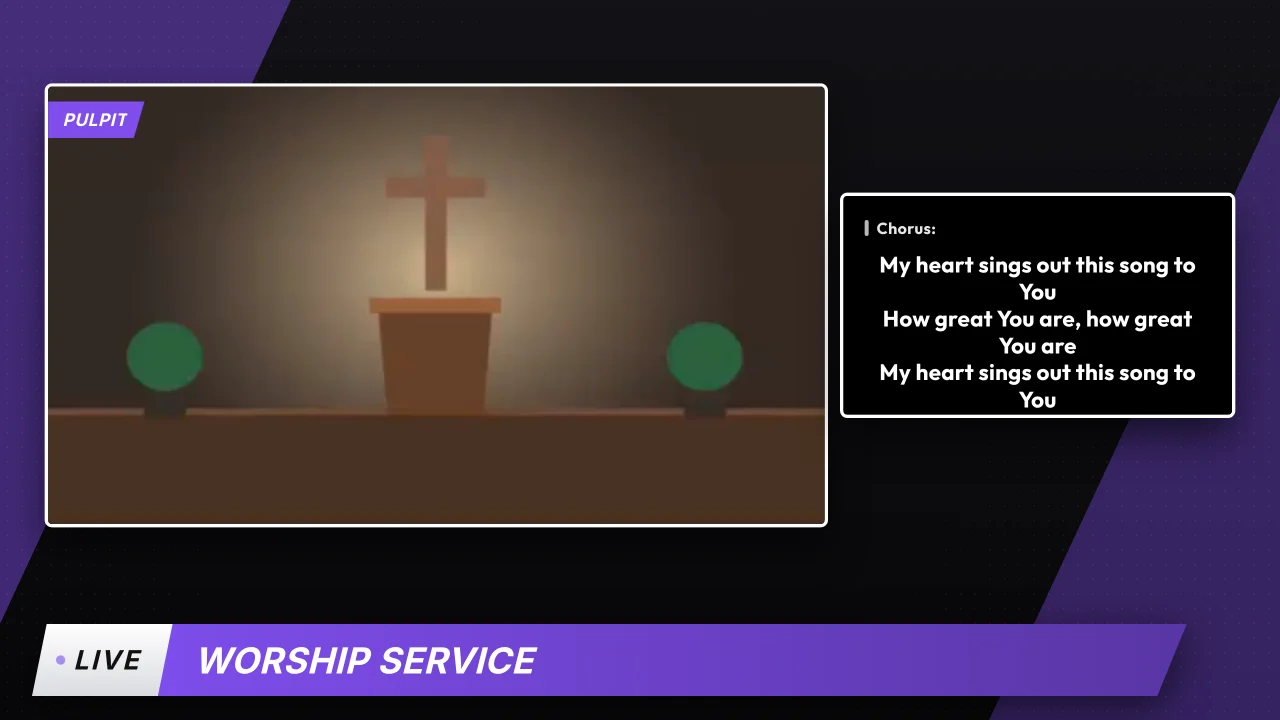
- In the Layout thumbnails, a filled box with a camera drawn on it is a camera and a light box with lines is the Current slide. If you change a box's source, the thumbnail changes too.
- With One camera, under Size you choose Full screen, Large frame or Small frame. In a frame, the template background shows around it; you can move the small one to the center or a corner under Position.
- While it is on air, whatever you change (layout, template or the lower third text) goes out right away, with no extra button.
- Templates use your church's main color and its logo next to LIVE.
- The number of boxes depends on how many cameras your plan allows: with 2 cameras you can combine both and the slide.
Take photos that go to the projector
On the phone, switch to Photo, tap Open camera and then Take photo. Each photo is saved to your church's Google Drive and appears in the program's Resources, inside the Camera folder.
With Send straight to the projector on (the default), the photo appears on screen as soon as you take it. If you turn it off, photos are only saved and you can project them later from Resources.
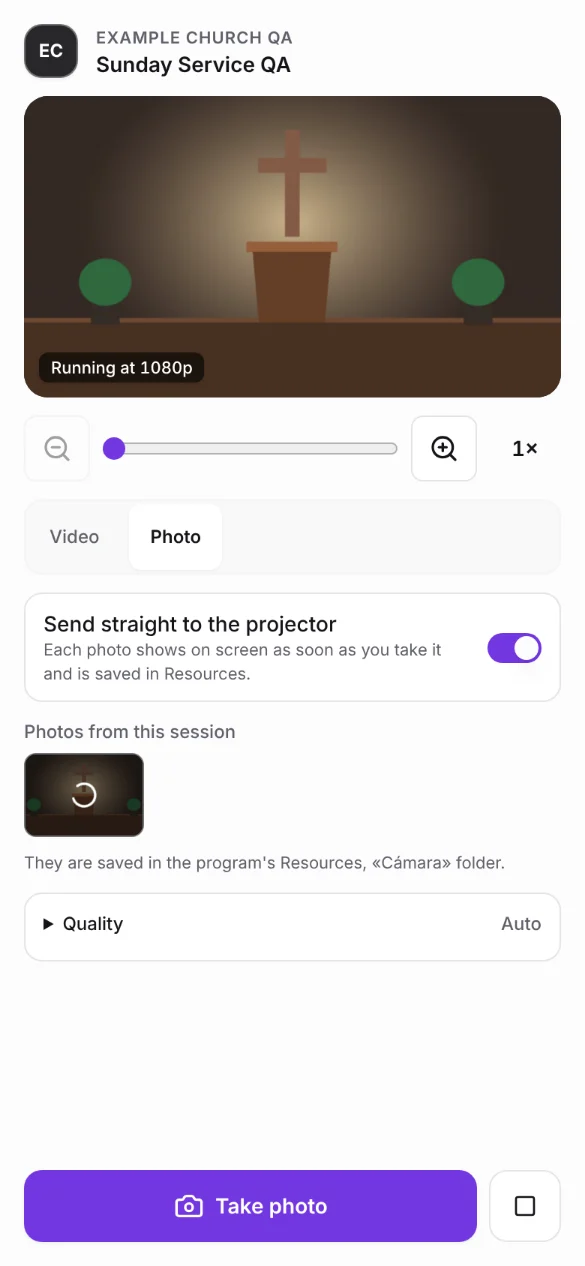
Note:Photos require the church to have Google Drive linked. If a photo fails to upload, it is marked in red: tap it to try again.
Quality and connection
- Auto starts at 1080p and lowers by itself if the network can't keep up, so the video doesn't freeze. You can also set 720p, 1080p, 2K or 4K if the phone supports it.
- The video goes straight from the phone to each screen over the network. It works best with the phone and the projector computer on the same church Wi-Fi.
- Keep the camera page open and the phone screen on while you stream.
- Computer, USB camera or capture card: open the camera link on the computer it is connected to and choose it under Camera on this device. With an HDMI capture card you can use a professional camera.
Use a professional, USB or computer camera
- Connect the camera to a computer: a webcam or USB camera plugs in directly; a professional camera goes over HDMI into a capture card connected by USB.
- On that computer, open the camera link: in the live panel's Camera menu tap Open, or copy the link and open it there. You don't need the QR code or to sign in.
- Under Camera on this device, choose the camera or the capture card.
- Type a name, like Main camera, and tap Start streaming. From there it works just like a phone: it shows up in the Camera menu and you put it on air the same way.
Tip:It can be the same computer as the live panel: open the link in another window.
Good practices
- If you shared the link by mistake, tap Regenerate camera link: phones using the previous link are disconnected.
- If you already have your plan's maximum number of cameras, the next phone waits and the menu tells you so.