Start here
How to use the AI assistant
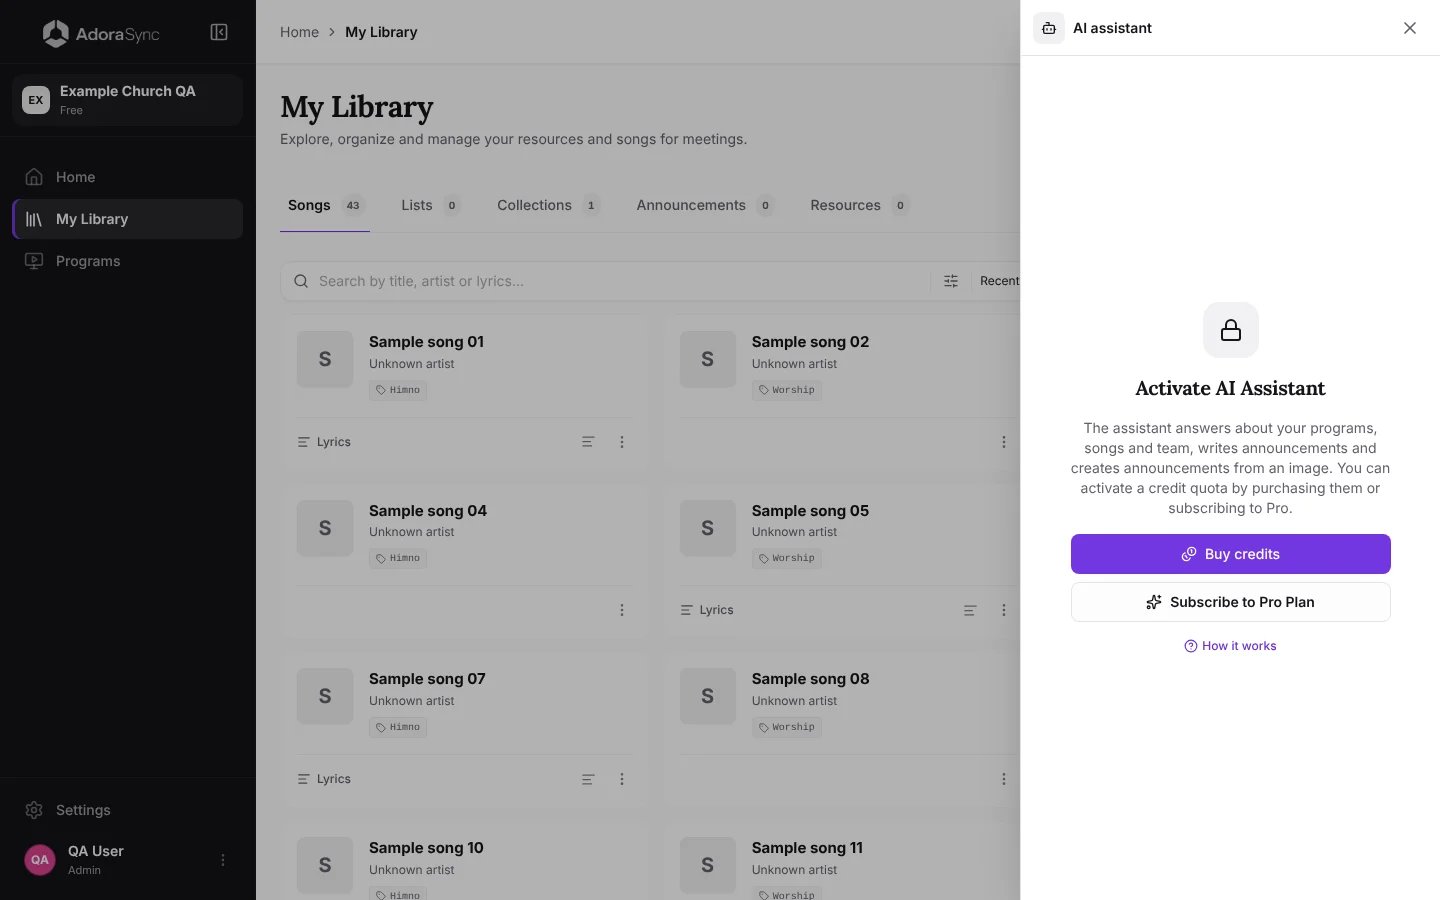
The AI assistant answers questions about your organization (programs, songs, members and announcements), writes texts for you, changes your programs when you ask (you confirm every change) and explains how to do things in the app. It also builds a complete announcement from the image you share on WhatsApp and creates new images for your backgrounds and announcements. It is included in the Pro and Church plans.
Open the assistant
- On a computer: click the assistant icon in the top bar, next to the notifications bell. A panel opens on the right and you can keep working beside it.
- On a phone: tap the same icon in the top bar. The assistant takes up the whole screen.
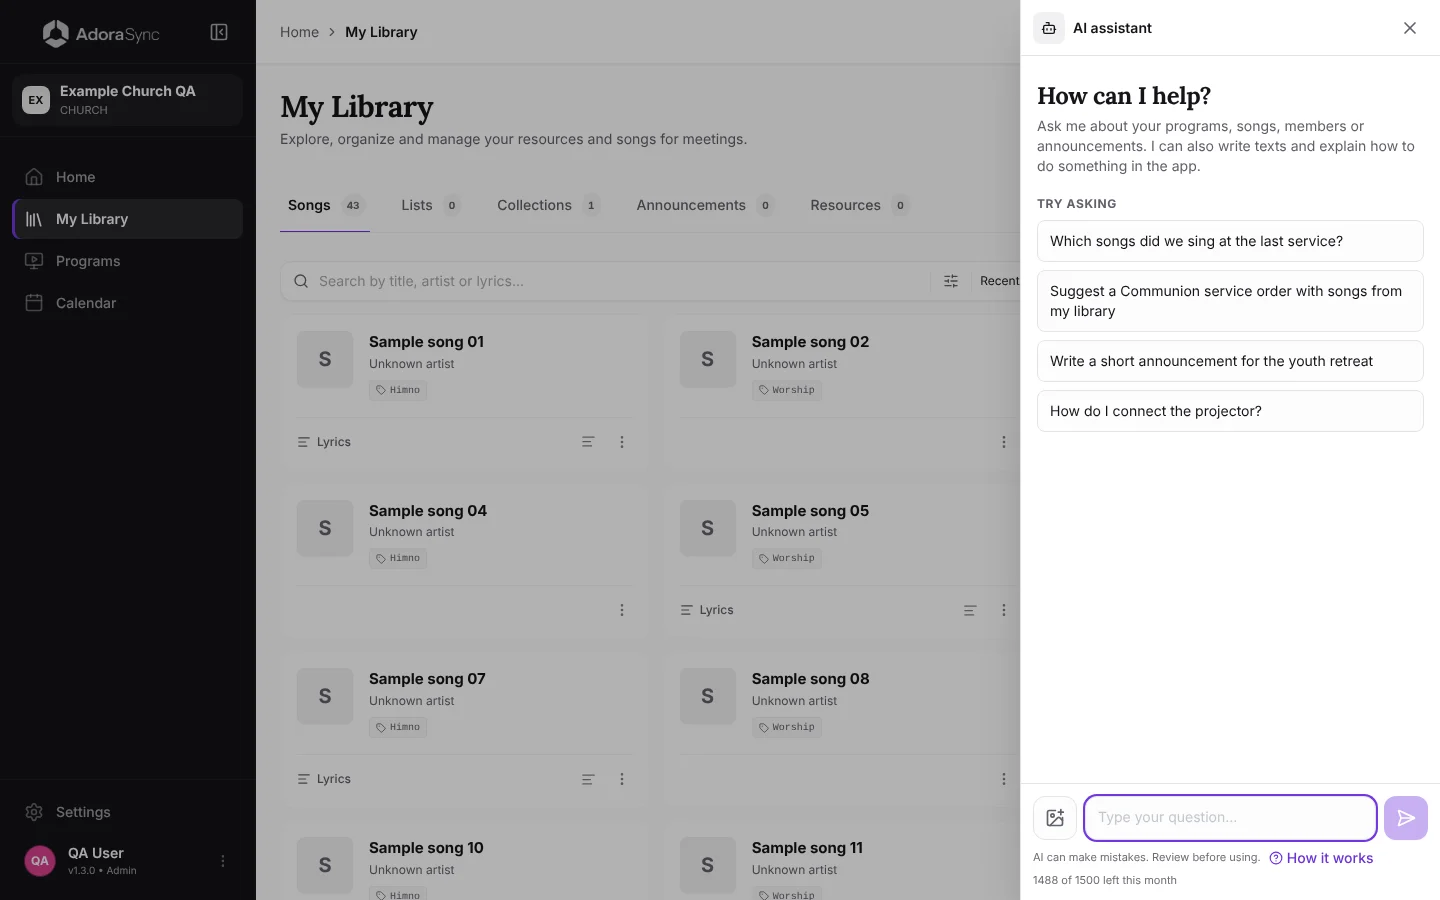
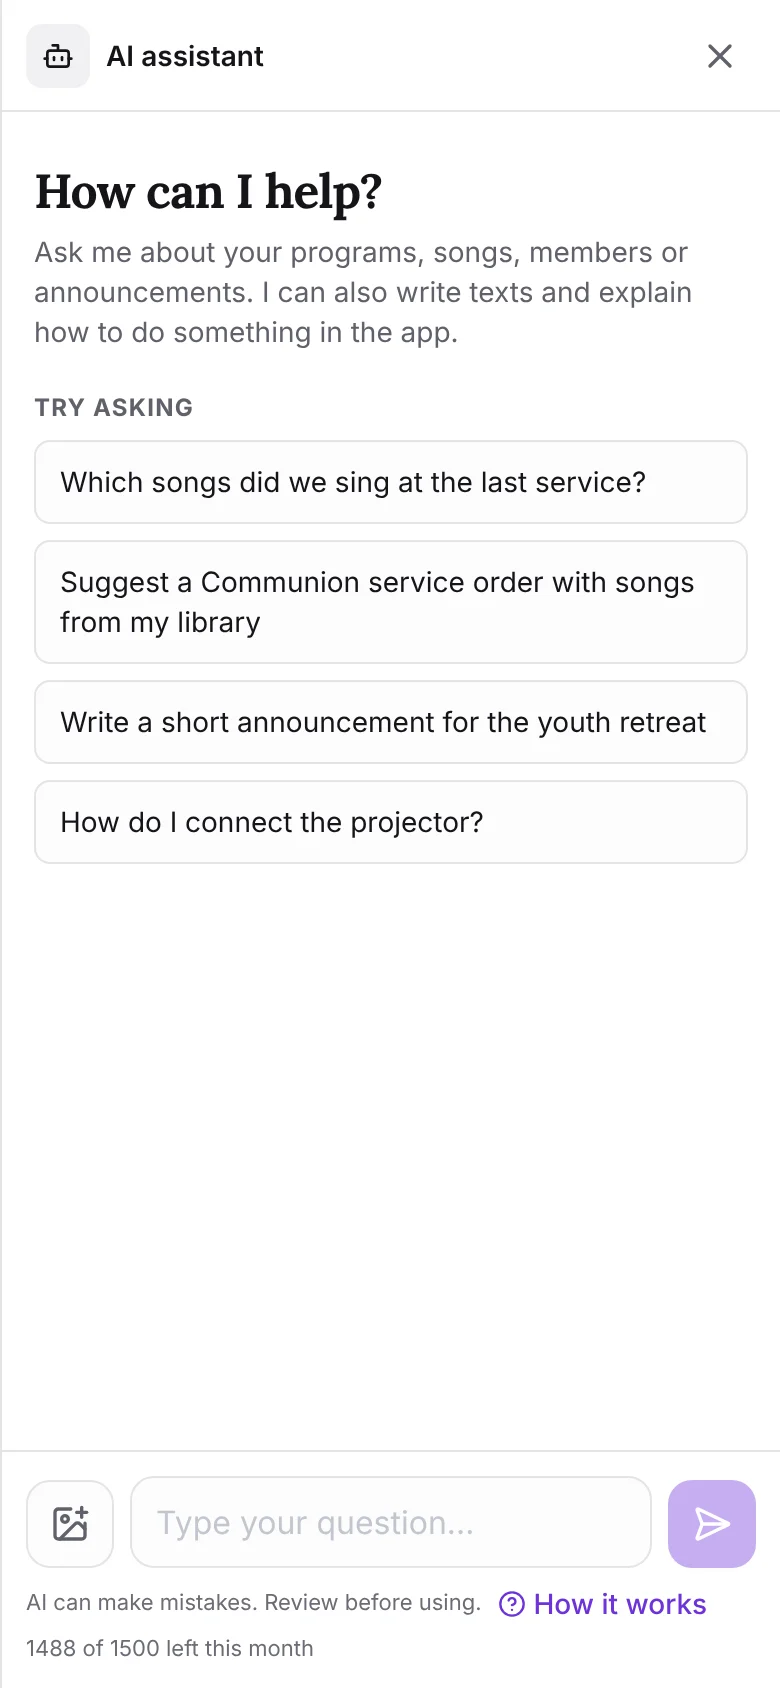
When you open it you will see a few sample questions. Tap one to start or type your own.
What you can ask
The assistant looks up your organization's real data, only what you can see with your role. Some examples:
- Programs: “Which songs did we sing at the last service?”, “Who is leading worship at the next service?”.
- Songs: “Find communion songs in my library”, “What key is How Great Thou Art in?”.
- Team: “Who are the media technicians?”, “Who is in the youth unit?”.
- Announcements: “Which announcements are still active?”. And if you type “Create announcement”, it takes you to create one (we explain how below).
- Writing: an announcement, a welcome, a message for the team group chat or a proposed order of service with songs from your library.
- How-to: “How do I connect the projector?”. It answers with what this Help Center says.
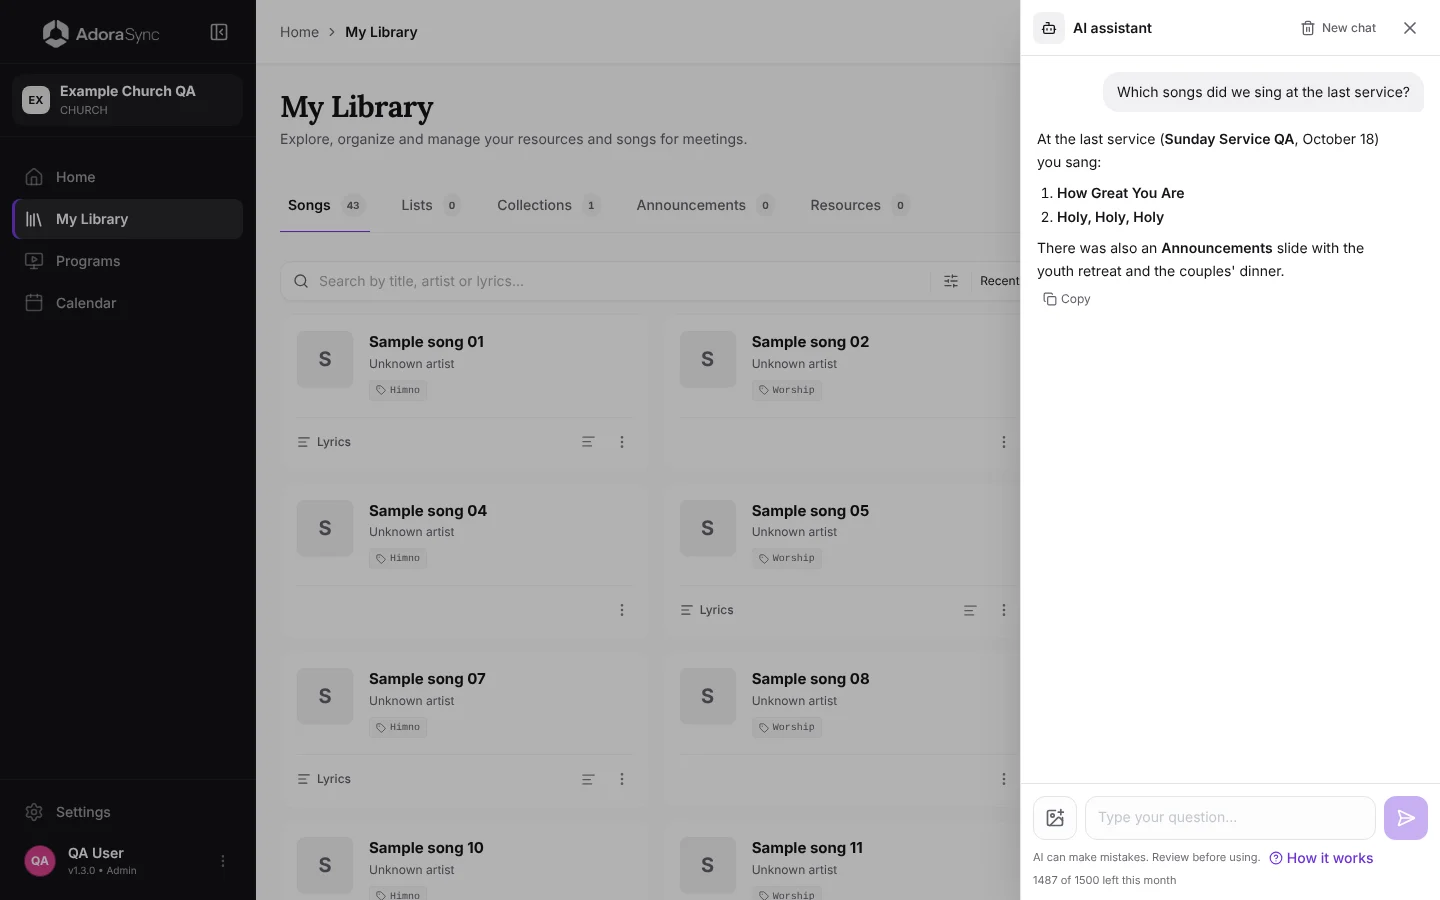
Copy appears below each answer. New chat starts a blank chat and keeps the previous one in history.
Dictate with the microphone
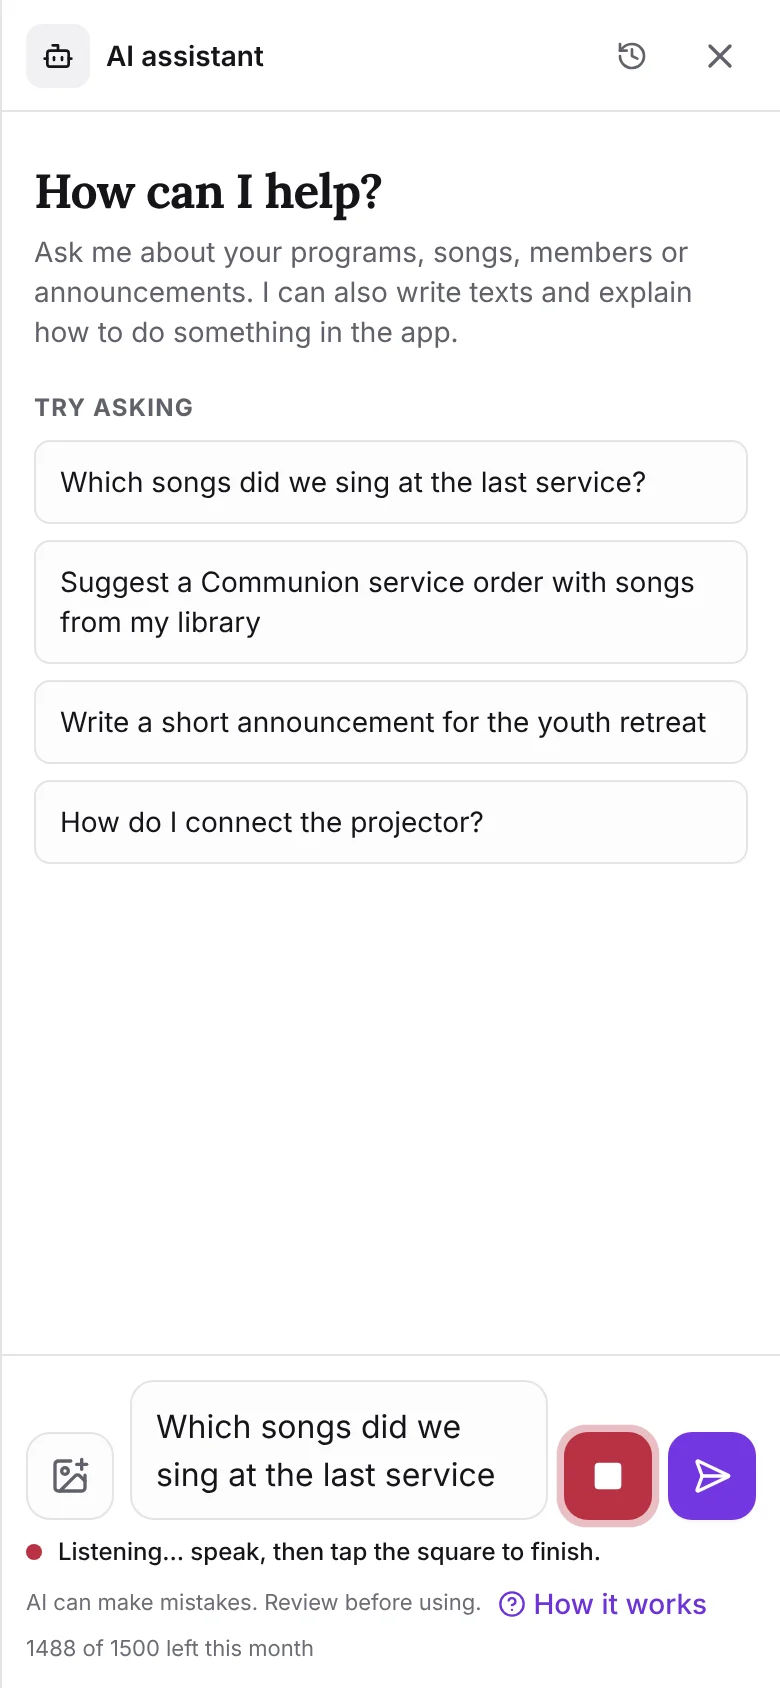
Don't feel like typing? Tap the microphone next to the box and say what you need: your words are written in the box, in the app's language, and you can fix them before sending. To finish, tap the square or send the message. The first time, the browser asks for permission to use the microphone. It works in Chrome, Edge and Safari; in Firefox the button doesn't show, but you can use your phone keyboard's dictation.
The assistant never saves changes on its own. When you ask it to change a program, it shows a proposal with Apply changes; for songs, announcements and new programs it opens the editor so you can review and save.
From chat to program
Paste the service order with its sections, date and links. The assistant can propose YouTube videos as media items. For a song without a link, it can search by title and hymnal number and ask you to confirm a match or add a URL. Open Review and create program, edit the draft and confirm to save.
Create or update songs
Try asking the assistant to prepare missing songs and add each link to the matching song. It looks for matches and offers Review new song or Review changes for songs you can edit. The form keeps existing links and recognizes the same YouTube video even when its URL differs. Review and save each song in its form.
Change a program from the chat
Ask the assistant for any change to a program, in your own words. If you're in the program editor, tap the assistant icon in the top bar and it already knows which program you mean. From another screen, say the program's name or date.
- Add: songs from your library, Bible passages (“add John 3:16 after Speak, Lord”), text slides, YouTube videos, countdowns, announcements and waiting screens.
- Reorder: “move all the songs to the end”, “put the offering before the sermon”, create, rename, move or delete sections.
- Adjust: “set a 5-second duration on items 5 and 10” (auto-advance), a countdown's length, an item's display name, remove or duplicate items.
- Details and team: name, date, time, location and description; the person in charge of a section; add or remove collaborators; duplicate the program with another date.
The assistant replies with a Proposed changes card: one change per line, with the item numbers you see in the editor. Uncheck anything you don't want and press Apply changes. Nothing is saved before that click.
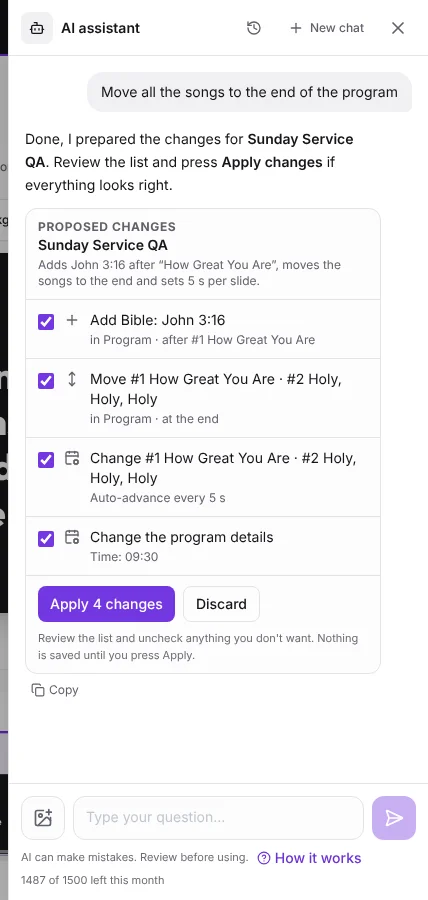
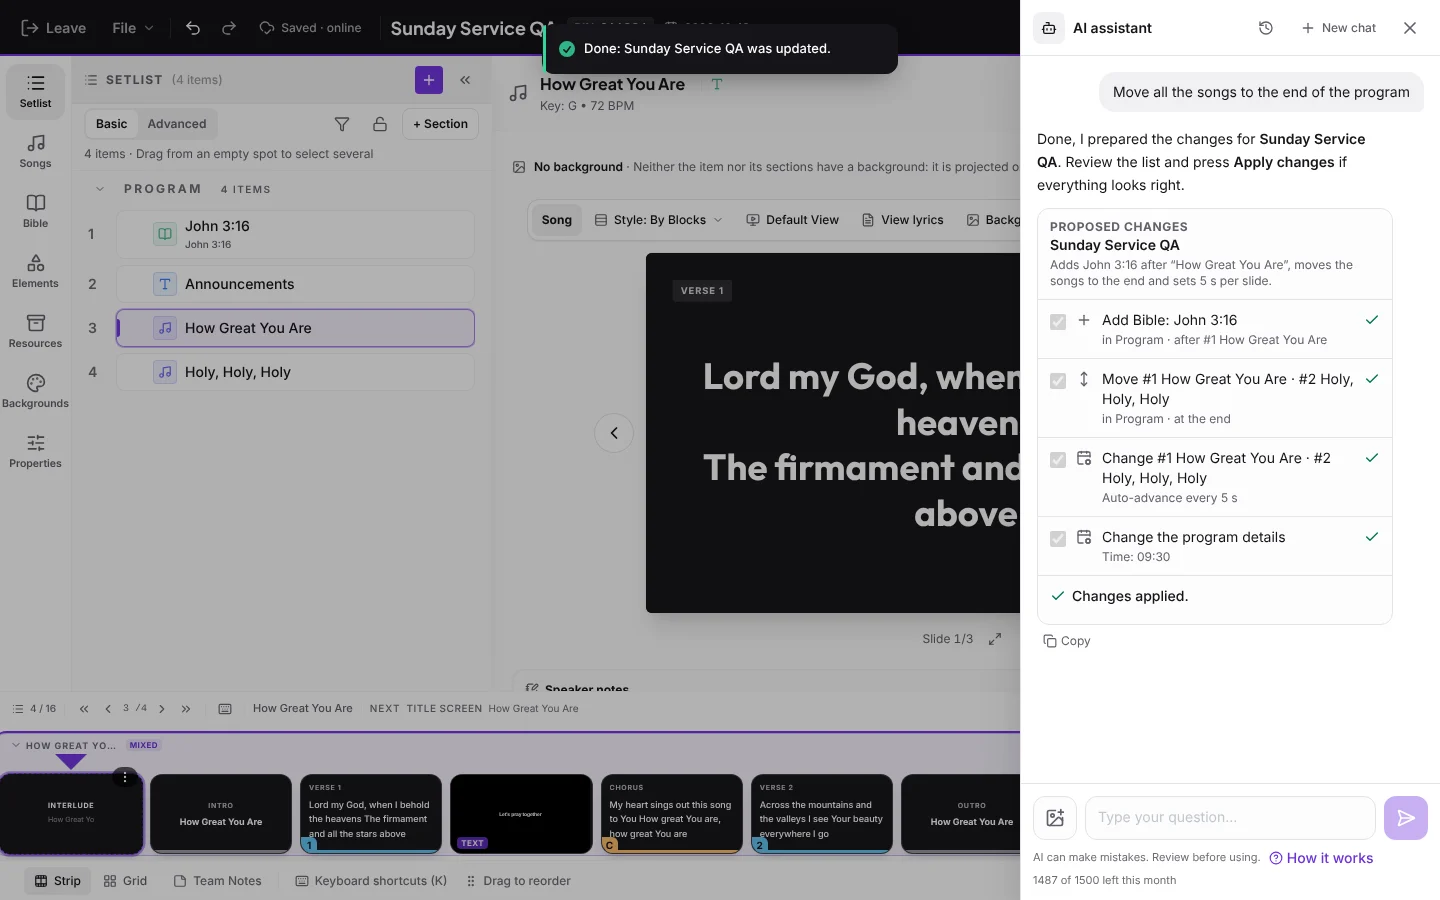
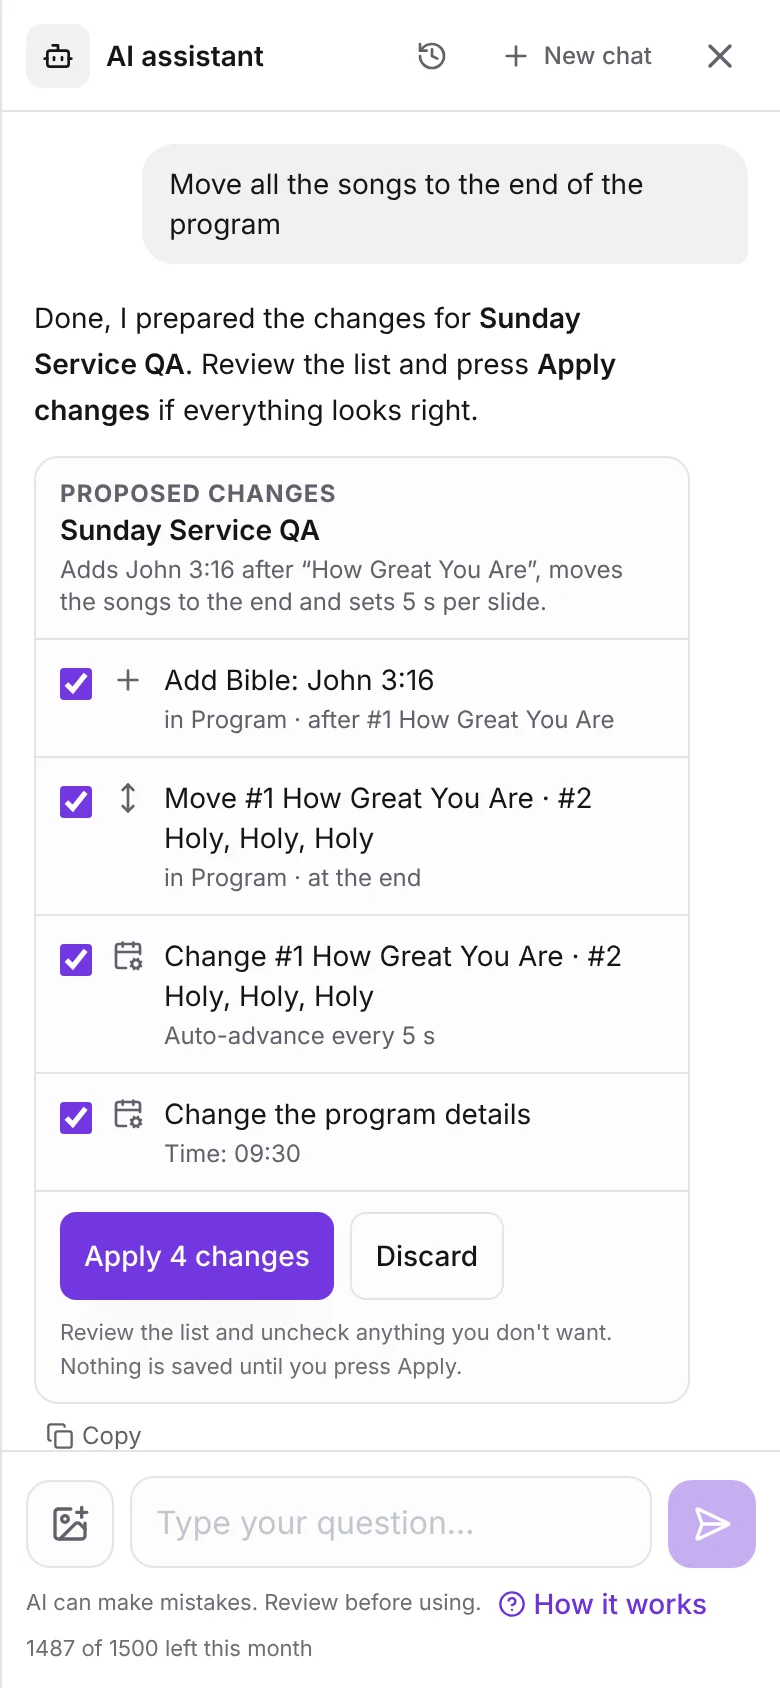
Tip:If the editor is open, Undo reverts all of the assistant's changes at once. Changes respect your role: if the program order is locked or your role can't edit it, the card tells you and nothing changes.
Resume and archive chats
Open Conversation history to resume a chat. Use Archive conversation to move it to Archived. Restore it there and open it again under Recent.
Create an announcement from an image
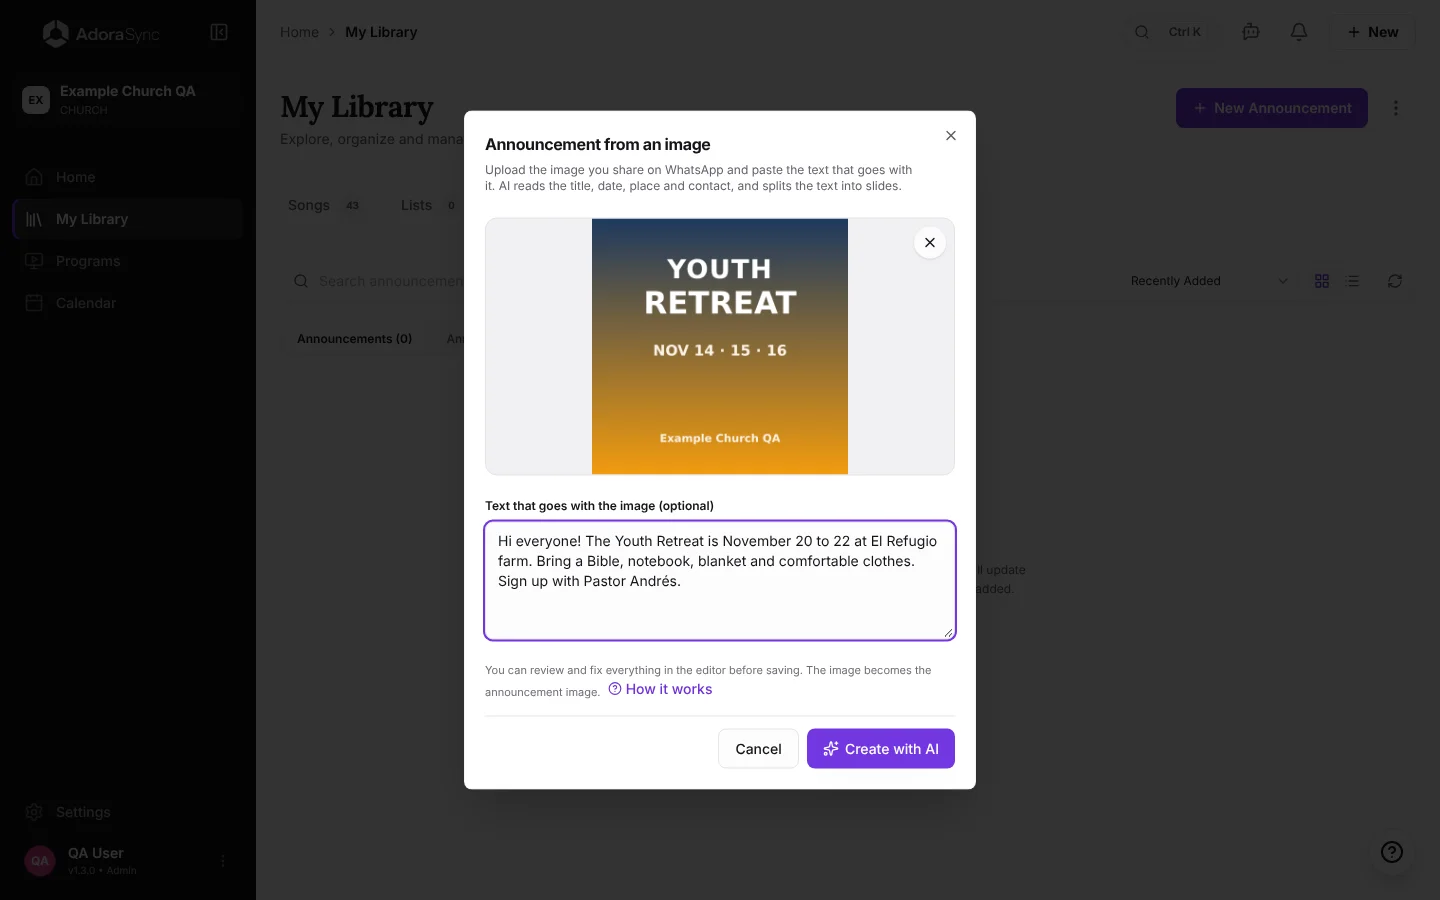
If you already have the event flyer and the message you send on WhatsApp, the AI builds the announcement for you.
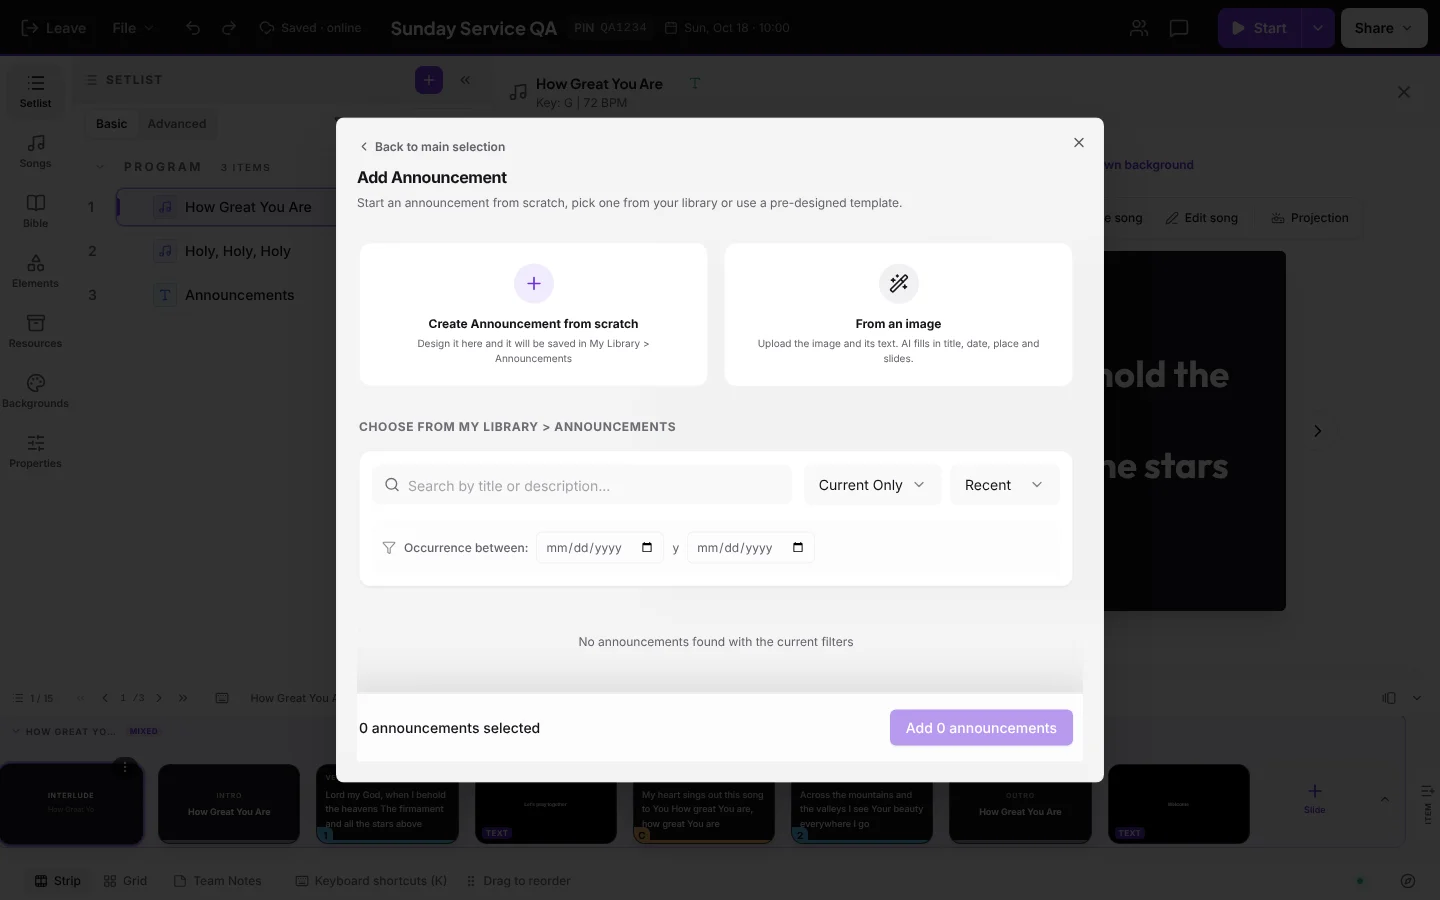
- Open My Library › Announcements › New Announcement, or in the program editor Add › Announcement.
- Choose From an image.
- Upload the image: pick it, drag it or paste it with Ctrl V.
- If you like, paste the text that goes with it.
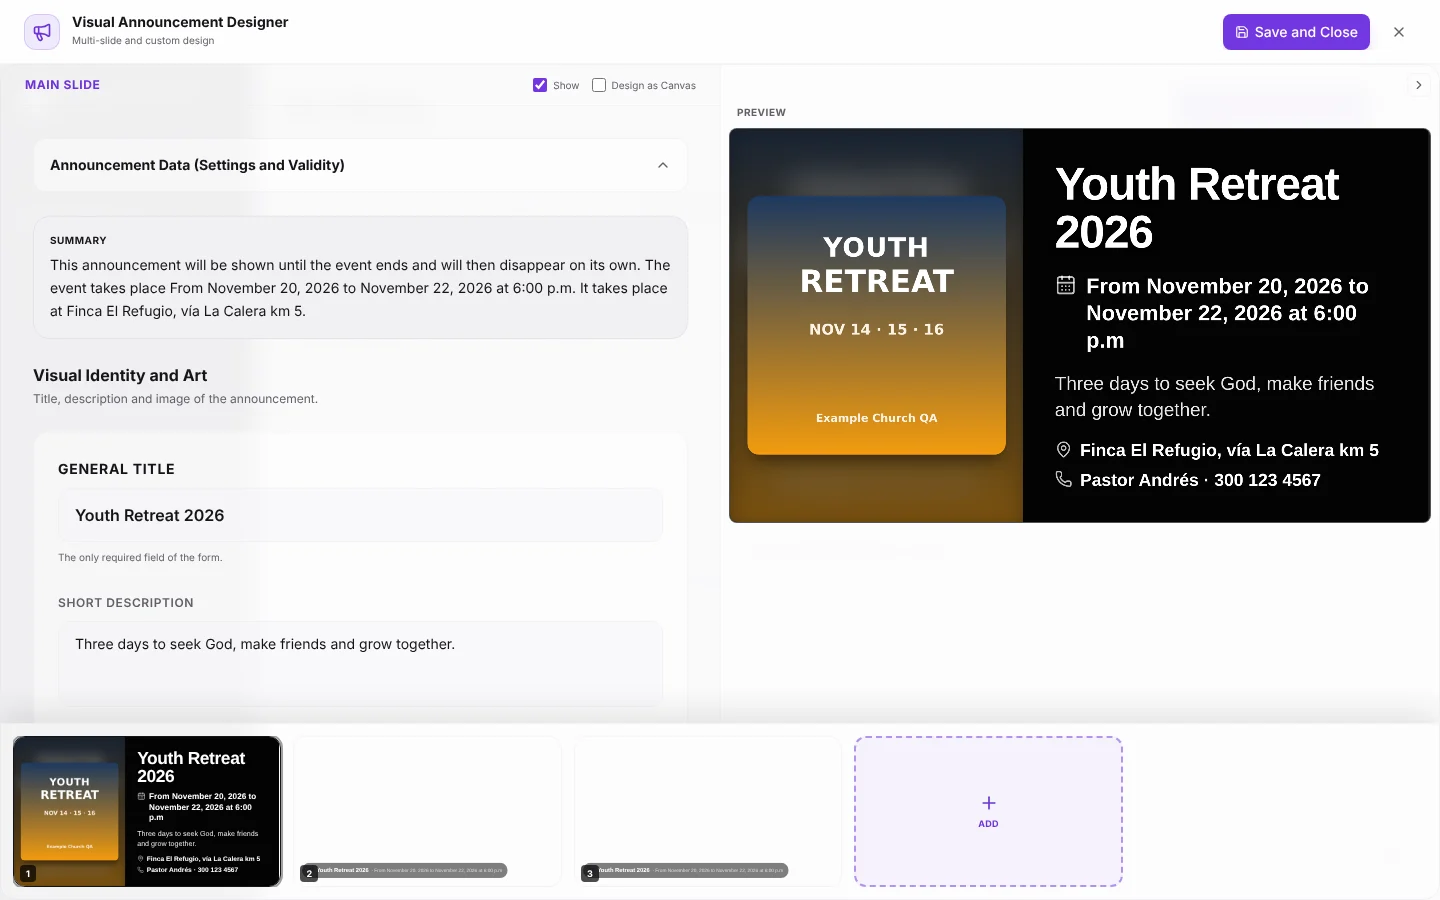
- Tap Create with AI. In a few seconds the announcement editor opens with everything filled in.
- Review it, fix whatever needs fixing and tap Save and Close.
What the AI fills in
- The title and a short description.
- The dates and times. If the event lasts several days, it creates all of them.
- The location: in person, virtual or both.
- The contact and the registration link, if they appear.
- The rest of the text goes into text slides. If it is long, it spreads it over several so it reads well on screen.
- The image you uploaded becomes the announcement image and is saved in your Google Drive.
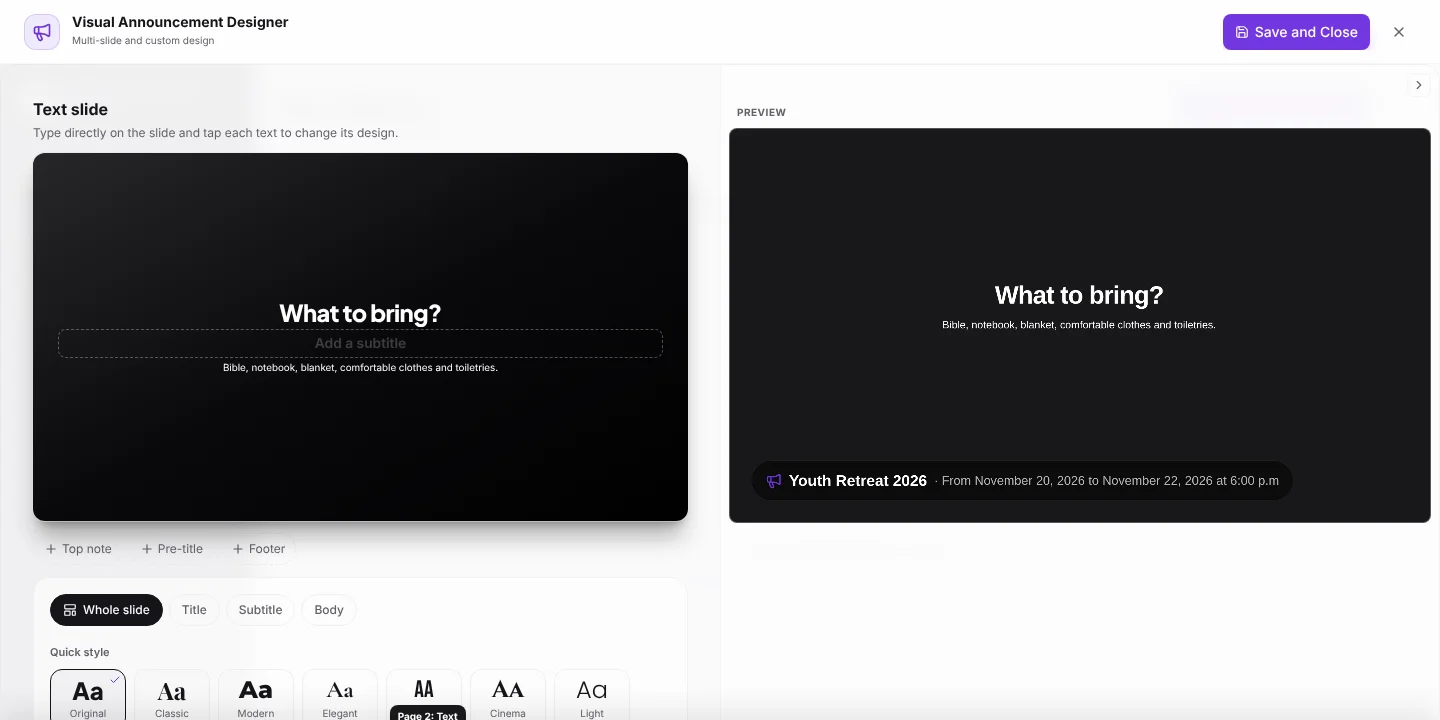
Tip:Nothing is saved until you tap Save and Close. If the AI misread a date or a name, fix it in the editor before saving.
Start from the assistant chat
You don't need to look for the option: ask the assistant for it.
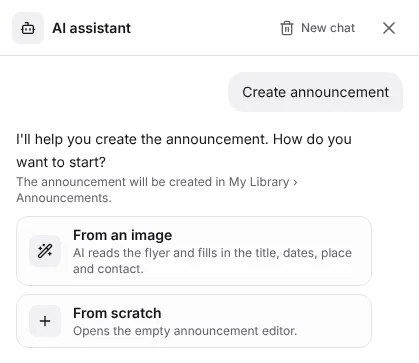
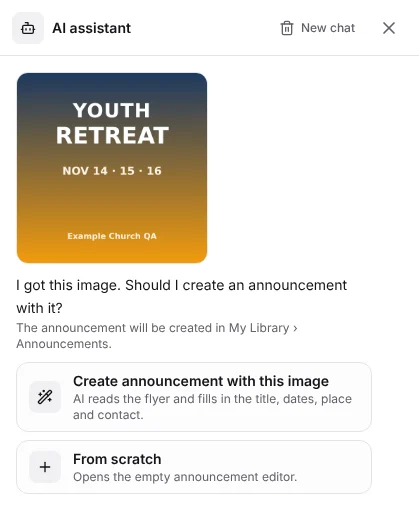
- Type Create announcement (or “new announcement”). The assistant replies with two buttons: From an image and From scratch. This reply doesn't use any of the month's messages.
- Already have the flyer? Paste it into the chat with Ctrl V, drag it onto the panel or attach it with the image button, to the left of the text field. If you typed the WhatsApp message first, it goes along with the image.
- Tap Create announcement with this image. Announcement from an image opens with the flyer already loaded; all that is left is to tap Create with AI.
- The announcement is created in My Library › Announcements. To put it in a program, use Add › Announcement in the program editor.
Create images with AI
Need a background for a song or an image for an announcement and don't have one at hand? Describe it in your own words and the AI creates it in a few seconds. No design skills needed.
Where the button is
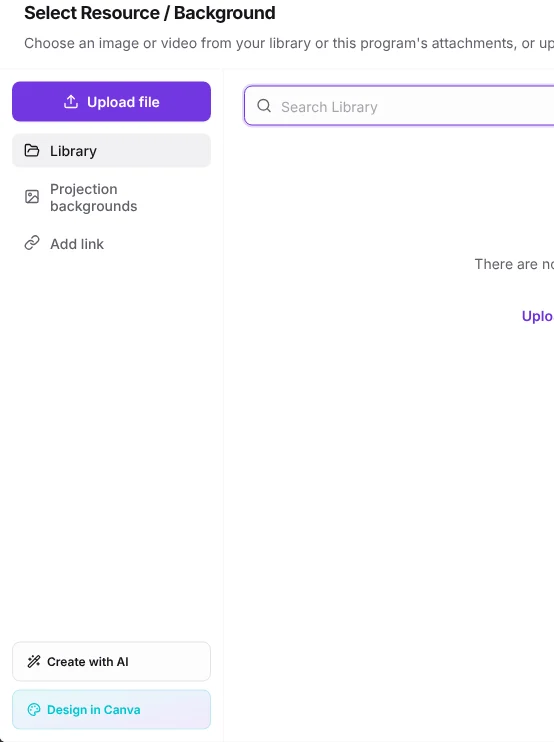
Look for the Create with AI button, with the magic wand icon. It appears everywhere you choose an image:
- In the Select Resource / Background window, at the bottom left, next to Design in Canva. This window opens when you change the background of a song or a section, the program cover or a media slide.
- In the announcement editor, below Official Announcement Image and the general background.
- On a phone, in the row of options at the top of the same window.
Step by step
- Tap Create with AI.
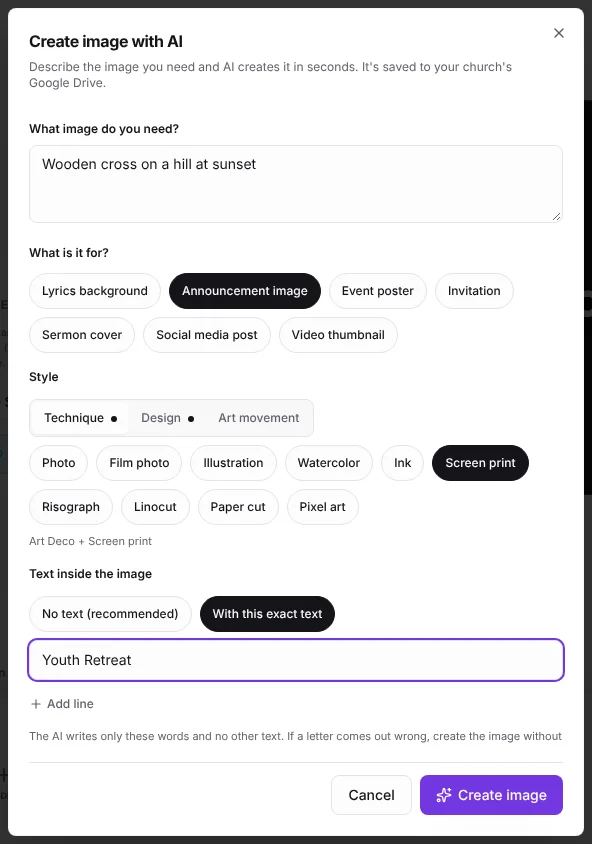
- In What image do you need? describe what you want to see, for example Wooden cross on a hill at sunset, golden sky. The more details you give (colors, place, time of day), the better it turns out.
- In What is it for? choose the piece: Lyrics background (soft, to put lyrics on top), Announcement image, Event poster, Invitation, Sermon cover, Social media post or Video thumbnail.
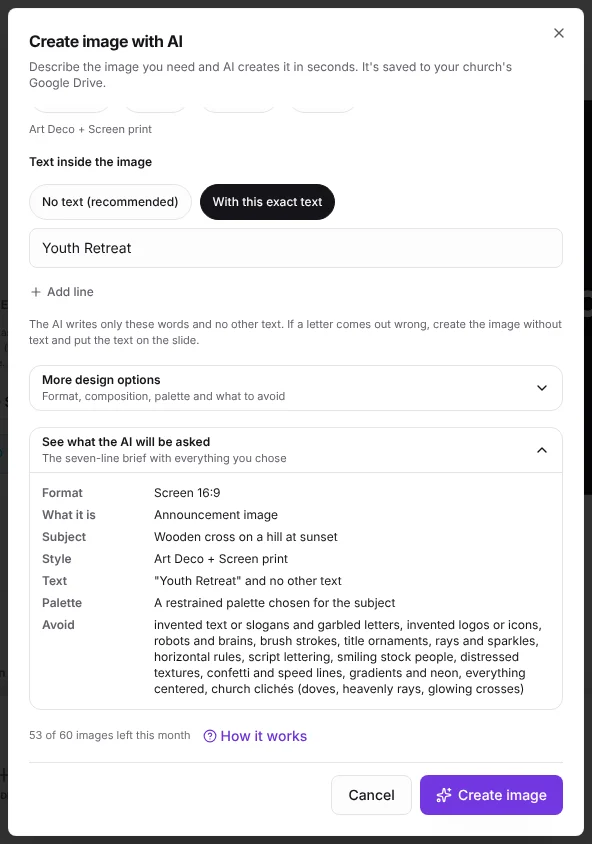
- In Style choose a technique, a design or an art movement, or one from each tab to mix them (for example Art deco + Screen print). If you don't choose, the AI picks a specific style.
- In Text inside the image leave No text or choose With this exact text and type up to three lines.
- Tap Create image and wait. It usually takes between 15 and 40 seconds; don't close the window in the meantime.
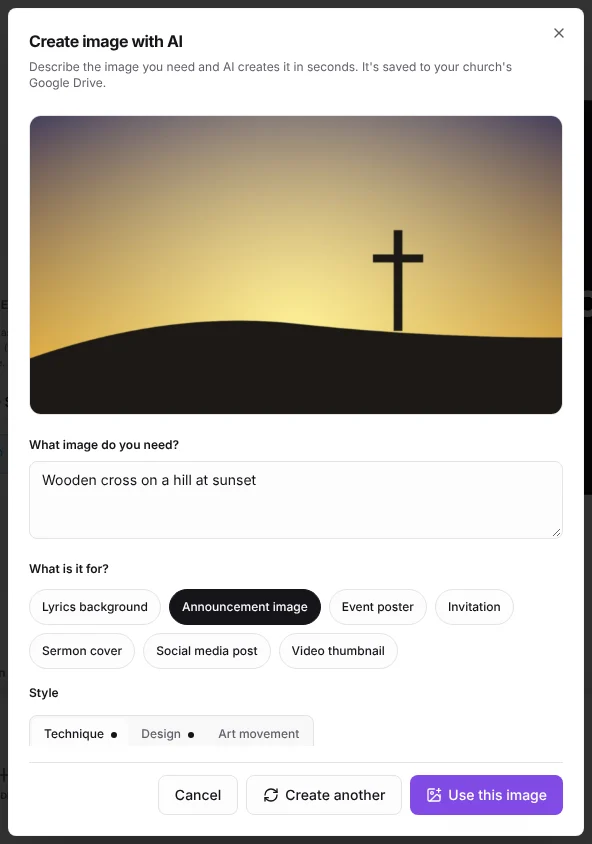
- Look at the preview. If you like it, tap Use this image and it is placed where you asked for it. If not, change whatever you want (for example just the style) and tap Create another: everything else stays.
- The image is saved in your church's Google Drive, like any file you upload.
- It comes out in landscape format, the size of a slide, unless you choose another format in More design options.
- Below the description you see how many images your organization has left this month.
Tip:For backgrounds and slides, leave No text. The AI sometimes misspells words and dates. Put the text on the slide and it will always come out right. Use exact text only for pieces such as a poster or an invitation.
Avoid the “AI look”
If you don't give it specific instructions, the AI does the most typical thing for the topic and the image looks generic. That is why every image comes with a brief: what the piece is, the style, the composition, the exact text, the palette and, above all, what to avoid.
Open More design options to adjust:
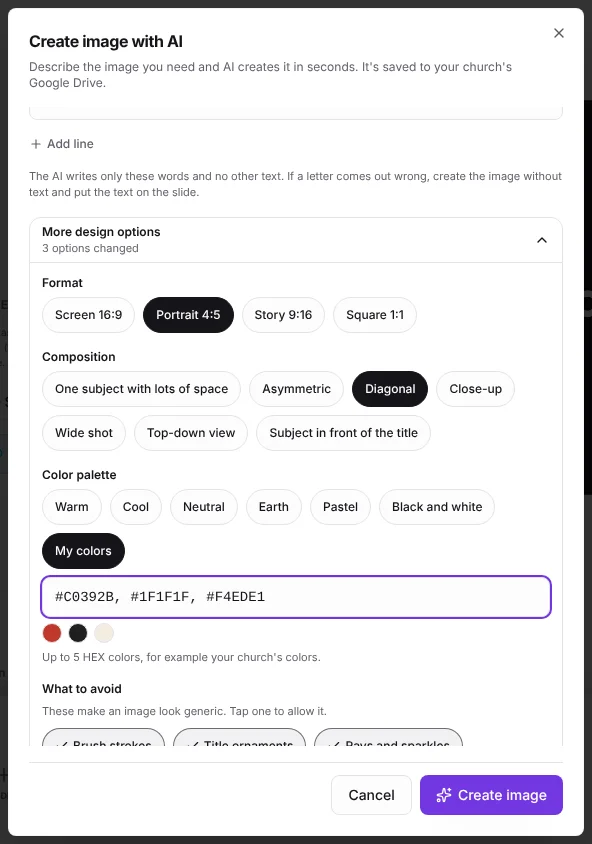
- Format: Screen 16:9 (for projecting), Portrait 4:5, Story 9:16 or Square 1:1 (for sharing on social media or WhatsApp).
- Composition: one subject with plenty of space, asymmetric, diagonal, close-up, wide shot, top view or subject in front of the title.
- Color palette: warm, cool, neutral, earth, pastel, black and white, or My colors with up to 5 HEX colors, for example your church's.
- What to avoid: the clichés that make everything look the same come pre-checked (brush strokes, rays and lens flares, script lettering, gradients and neon, everything centered, doves and beams from the sky…). Tap one to allow it, or type something else in Also avoid. Made-up text, made-up logos and robots are always avoided.
Before creating, tap See what the AI will be asked: it shows the seven-line brief with everything you chose. That way you can check it is right before using up one of the month's images.
If something doesn't work
- “That description can't be turned into an image”: the AI doesn't create some images, for example violent ones or images of famous people. Change the wording and try again. It doesn't use up an image.
- “You're going too fast”: you can create up to 3 images per minute. Wait a moment.
- “You've used all of this month's images”: they renew on the 1st of the next month.
- If you see the Pro label on the button, your plan doesn't include images. Tap it and then See plans.
Plans and message limits
| Plan | Messages per month | Images per month |
|---|---|---|
| Free | Only with credits | Only with credits |
| Pro | 300 | 20 |
| Church | 1,500 | 60 |
- Limits apply to the whole organization and renew on the 1st of each month. Below the text field you see how many messages or images are left.
- Each question counts as one message, and so does each announcement created from an image. Each image created, even if you choose Create another, counts as one image.
- If you send many messages in a row, the assistant asks you to wait a minute.
Buy AI credits
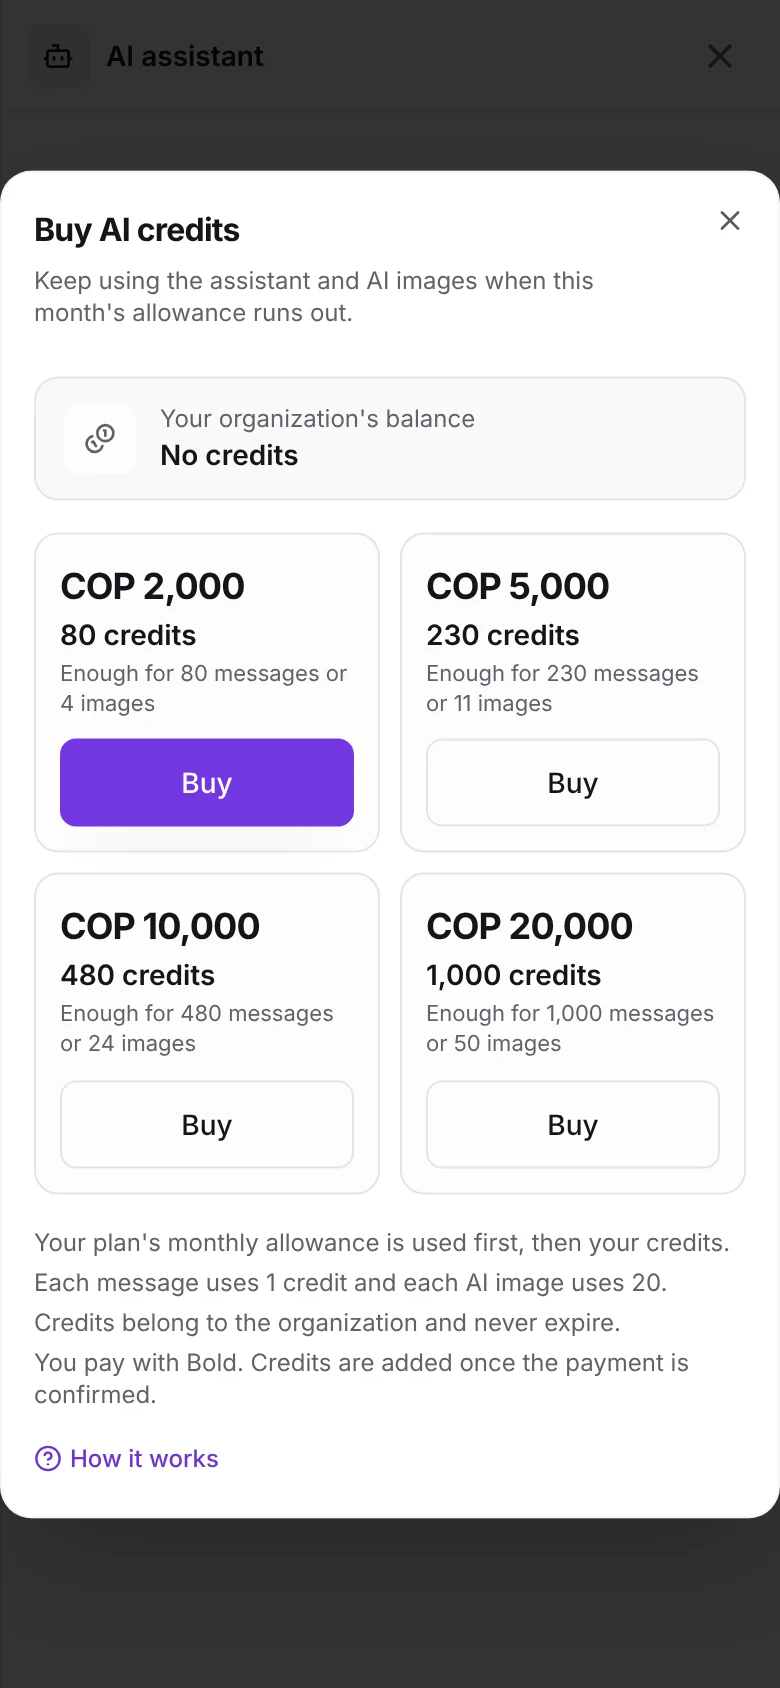
When the monthly allowance runs out, or if your organization is on the Free plan, you can buy credits and keep using AI without changing plans. Tap Buy credits in the assistant notice, in the Create with AI window or in Announcement from an image.
| Pack | Credits | Good for |
|---|---|---|
| COP 2,000 | 80 | 80 messages or 4 images |
| COP 5,000 | 230 | 230 messages or 11 images |
| COP 10,000 | 480 | 480 messages or 24 images |
| COP 20,000 | 1,000 | 1,000 messages or 50 images |
- Your plan's monthly allowance is used first, then your credits.
- Each assistant message, each announcement from an image and each Fill in with AI uses 1 credit. Each AI image uses 20.
- Credits belong to the organization, anyone on the team can use them and they never expire.
- You pay with Bold. Credits are added as soon as Bold confirms the payment; if the AI fails, the credit is refunded.
Privacy and good practices
- History is saved in this browser for each account and organization. Attachments are available during the session.
- The assistant only sees what your role allows you to see.
- AI can make mistakes. Check dates, names and Bible verses before publishing or projecting.
Can the assistant create the program for me?
For now it suggests the order with songs from your library and you build it in the editor. It doesn't change anything on its own.
Can images created with AI be used at church?
Yes. They are new images created for you. Always check that they look right before projecting them.
What happens when the month's messages run out?
The assistant lets you know and works again on the 1st of the next month. If you use it a lot, the Church plan comes with more messages.